

Gaming PC Won’t POST? Understanding Motherboard Debug LEDs, Q-Codes & Beep Codes
You press the power button on your gaming PC. The fans start spinning, RGB lighting turns on, and the graphics card appears to receive power—but the computer never reaches the BIOS or Windows.
When this happens, the system may be failing during the Power-On Self-Test (POST). Before a gaming PC can load the operating system, the motherboard checks critical hardware such as the CPU, RAM, graphics card, and boot devices. If something prevents one of these checks from completing, the system may stop during POST.
Fortunately, many modern gaming motherboards provide diagnostic tools that can help identify where the startup process is failing. Depending on the motherboard, you may see CPU, DRAM, VGA, or BOOT debug LEDs, a two-digit Q-Code or POST code, or hear a sequence of beep codes.
These indicators can provide an important starting point, but they do not always identify the failed component directly. For example, a DRAM light does not automatically mean the RAM itself is defective. Memory initialization can also be affected by the CPU, motherboard, BIOS settings, memory compatibility, or even socket contact problems.
At Prime Tech Support, we diagnose gaming PCs that fail to POST using systematic hardware testing rather than replacing parts based only on a warning light or code.
This guide explains what motherboard debug LEDs, POST codes, Q-Codes, and beep codes mean, what can cause a gaming PC to stop during POST, and how to determine when the problem requires deeper hardware diagnostics.
Table of Contents
What Does It Mean When a Gaming PC Won’t POST?
POST stands for Power-On Self-Test. It is one of the first processes your computer performs after you press the power button. During POST, the motherboard initializes and checks essential hardware before allowing the system to continue into the BIOS or operating system.
A typical POST process involves checking or initializing components such as:
- CPU
- System memory (RAM)
- Graphics card or integrated graphics
- Motherboard controllers
- Storage and boot devices
- Connected hardware required during startup
If one of these stages cannot complete successfully, the gaming PC may stop before reaching the BIOS screen. Depending on the motherboard and the type of failure, the system may display a debug LED, POST code, Q-Code, or beep sequence that provides information about where initialization stopped.
Powering On Is Not the Same as Completing POST
One of the most important distinctions when diagnosing a gaming PC is that receiving power does not mean the computer has successfully completed POST.
A PC can have spinning fans, illuminated RGB components, an active liquid cooler, and LEDs on the graphics card while still being unable to initialize the hardware required to boot.
This is why a gaming PC that powers on but produces no usable display requires more investigation than simply checking whether the power supply is working.
If the computer appears to complete startup but the monitor still receives no signal, the problem may instead be related to the display path, graphics card, monitor, cable, or another hardware issue. Our Gaming PC Turns On But No Display troubleshooting guide covers that situation in more detail.
Common Signs That a Gaming PC Is Failing POST
A system that cannot complete POST may show one or more of the following symptoms:
- The PC powers on but never reaches the BIOS screen.
- The monitor remains black or reports no signal.
- A CPU, DRAM, VGA, or BOOT motherboard debug LED remains illuminated.
- A two-digit POST code or Q-Code stops on the same value.
- The motherboard produces a repeating beep-code pattern.
- The computer repeatedly powers on and restarts.
- Fans spin at high speed while the system remains unresponsive.
- The system becomes stuck during memory initialization or training.
The exact symptom depends on the motherboard, BIOS, installed hardware, and the point at which the POST process stops. Understanding the motherboard’s diagnostic indicators is therefore one of the most useful first steps when determining why a gaming PC will not boot.
What Motherboard Debug LEDs Mean
Many modern gaming motherboards include a small group of diagnostic LEDs designed to show which stage of POST is currently being checked. Depending on the manufacturer, these may be called Debug LEDs, Q-LEDs, EZ Debug LEDs, or POST status LEDs.
The exact design varies between motherboard brands, but the most common indicators are labeled CPU, DRAM, VGA, and BOOT.
| Debug LED | What It Usually Indicates | Possible Areas to Investigate |
|---|---|---|
| CPU | The system is having trouble initializing the processor. | CPU installation, CPU power, socket contact, BIOS compatibility, motherboard, or processor |
| DRAM | Memory initialization or training is not completing normally. | RAM seating, memory compatibility, DIMM slots, XMP/EXPO settings, CPU memory controller, or motherboard |
| VGA | The motherboard is having difficulty detecting or initializing the graphics hardware. | Graphics card, PCIe slot, GPU power, PCIe connection, riser cable, motherboard, or GPU |
| BOOT | POST may have progressed through the main hardware checks, but a valid boot device cannot be found or accessed. | SSD, NVMe drive, BIOS boot configuration, operating system, storage connection, or bootloader |
CPU Debug LED
A CPU light that remains illuminated means the motherboard encountered a problem while attempting to initialize the processor. However, this does not automatically mean the CPU has failed.
Possible causes include an improperly seated processor, damaged or contaminated socket contacts, missing CPU power, an incompatible BIOS version, excessive mounting pressure, a motherboard fault, or a problem with the processor itself.
On newly assembled or recently upgraded systems, BIOS compatibility is especially important. A motherboard may physically support a newer processor while still requiring a BIOS update before it can initialize that CPU correctly.
DRAM Debug LED
A DRAM light indicates that the system is having difficulty during memory detection, initialization, or training. Loose or incompatible RAM is a common cause, but it is only one possibility.
The problem may also involve a damaged DIMM slot, unstable XMP or EXPO settings, BIOS configuration, motherboard traces, CPU socket contact, or the memory controller integrated into the processor.
High-speed DDR5 systems can also take longer to complete memory training, particularly after changing RAM, clearing the CMOS, or modifying memory settings. Interrupting this process too quickly can sometimes make a normal training cycle appear to be a POST failure.
For systems experiencing instability after they do boot, see our guide to RAM-related gaming crashes.
VGA Debug LED
A VGA light generally means the graphics hardware was not initialized successfully. This may happen because the graphics card is not fully seated, PCIe power is missing, the PCIe slot has a problem, or the GPU itself has developed a fault.
However, the motherboard and CPU can also affect GPU initialization. For that reason, replacing the graphics card based solely on an illuminated VGA LED can lead to an incorrect diagnosis.
If the GPU is specifically missing or not being recognized, our GPU Not Detected in a Gaming PC guide explains the diagnostic process in greater detail.
BOOT Debug LED
A BOOT light is different from CPU, DRAM, and VGA indicators because the system may already have initialized the major hardware successfully. Instead, the motherboard may be unable to locate or access a valid device from which to start the operating system.
Possible causes include an undetected NVMe or SATA SSD, incorrect BIOS boot settings, a damaged bootloader, storage failure, or an operating system problem.
A BOOT LED therefore does not necessarily indicate that the motherboard itself has failed.
Important: Debug LEDs identify the stage where POST encountered a problem. They should be treated as diagnostic clues—not definitive proof that the component named beside the LED is defective.
What Are POST Codes and Q-Codes?
Higher-end gaming motherboards often provide more detailed diagnostics through a small two-digit display located directly on the motherboard. During startup, this display shows hexadecimal codes as the system moves through different stages of the Power-On Self-Test.
These are commonly referred to as POST codes. Some motherboard manufacturers use their own terminology, such as Q-Codes, but the basic purpose is similar: to provide more detailed information about the stage of hardware initialization.
When a gaming PC starts normally, you may see several codes appear and disappear quickly. This is usually expected. The important information is often the code where the system remains when POST cannot continue.
Why POST Codes Can Be More Useful Than Debug LEDs
A CPU, DRAM, VGA, or BOOT LED provides a broad indication of the area being checked. A POST code can provide a more specific clue about what the motherboard was attempting to initialize when the process stopped.
Depending on the motherboard and BIOS, codes may relate to processes such as:
- CPU initialization
- Memory detection and training
- Chipset initialization
- PCIe device detection
- Graphics initialization
- Storage controller initialization
- USB device initialization
- BIOS and firmware processes
- Transition from POST to the operating system
This additional information can be extremely useful when diagnosing a gaming PC that powers on but cannot reach the BIOS.
A POST Code Does Not Always Identify the Failed Part
One of the most common mistakes during POST troubleshooting is assuming that a code directly identifies the component that needs to be replaced.
For example, if the motherboard stops during memory initialization, defective RAM is certainly possible. However, the same behavior could potentially be caused by a DIMM slot problem, CPU socket contact issue, unstable memory settings, motherboard fault, BIOS problem, or the CPU's integrated memory controller.
The same principle applies to graphics-related codes. A POST code associated with PCIe or graphics initialization does not automatically prove that the graphics card itself has failed.
This is especially important when diagnosing expensive hardware. A systematic comparison of the motherboard and graphics card can prevent unnecessary component replacement. Our Motherboard vs. Graphics Card Failure guide explains how similar symptoms can originate from different parts of the system.
Always Check the Motherboard Manual
POST code definitions are not universal. The meaning of a specific hexadecimal code can vary depending on the motherboard manufacturer, model, BIOS version, and firmware implementation.
For that reason, the correct reference should always be the documentation for the exact motherboard being diagnosed.
Manufacturers such as ASUS, MSI, GIGABYTE, and ASRock provide motherboard manuals and support resources that can help identify the meaning of model-specific POST indicators.
Recording the code where the motherboard consistently stops can provide valuable information for the next stage of diagnosis.
What Do Motherboard Beep Codes Mean?
Before motherboard debug LEDs and two-digit POST displays became common, many computers relied on beep codes to report hardware problems during startup. Beep codes are still supported by some modern gaming motherboards, although the system may require a small internal speaker connected to the motherboard’s speaker header.
If POST encounters a problem, the motherboard may produce a specific sequence of short and long beeps. The pattern can help identify the stage where startup failed.
Depending on the motherboard and BIOS, beep codes may indicate problems involving:
- System memory
- Graphics hardware
- CPU initialization
- Motherboard or chipset functions
- Keyboard or peripheral initialization
- Other hardware required during POST
Why the Beep Pattern Matters
A single beep, several short beeps, one long beep followed by short beeps, or a continuously repeating pattern can have different meanings. If the PC produces a beep sequence, write down the exact pattern before shutting the system down.
For example, note whether you hear:
- One short beep
- Multiple short beeps
- One long beep followed by one or more short beeps
- A continuously repeating beep
- No beep at all
This information can then be compared with the documentation for the motherboard or BIOS.
Beep Codes Are Not Universal
There is no single beep-code standard that applies to every gaming PC. The meaning of a particular sequence can depend on the motherboard manufacturer, BIOS or UEFI implementation, and motherboard model.
A beep pattern that indicates a memory problem on one system may have a different meaning on another. For that reason, generic beep-code charts found online should not automatically be treated as the correct diagnostic reference for every PC.
Whenever possible, use the manual or support documentation for the exact motherboard model.
What If the Gaming PC Does Not Beep?
No beep does not necessarily mean the motherboard is dead. Many modern gaming PCs do not have an internal speaker installed, so the motherboard may be unable to produce an audible diagnostic code even if beep-code functionality is supported.
In these systems, motherboard debug LEDs or POST/Q-Code displays may provide more useful information.
If the motherboard has no diagnostic display, no debug LEDs, and no speaker, troubleshooting usually requires a more traditional process of testing the system with a minimal hardware configuration and isolating components individually.
Why a Gaming PC Can Suddenly Stop POSTing
A gaming PC that previously worked normally can suddenly fail to POST for several reasons. The failure may appear after a hardware upgrade, BIOS change, power event, system cleaning, transportation, or seemingly without warning.
The diagnostic LED or POST code can help narrow down where startup is stopping, but identifying the actual cause usually requires looking at what changed before the problem began.
RAM Was Upgraded or Removed
Memory-related POST problems are common after installing new RAM, changing DIMM positions, or removing modules for cleaning or maintenance.
A module may not be completely seated, the new memory kit may not be compatible with the existing configuration, or the motherboard may need to perform memory training before it can boot normally.
High-speed DDR5 configurations can be particularly sensitive to memory settings and compatibility. Enabling aggressive XMP or EXPO profiles may also create a configuration that previously booted but is no longer stable.
The CPU or Cooler Was Recently Changed
If the CPU, cooler, or motherboard was recently removed or replaced, a POST failure can originate around the processor socket.
Possible causes include incorrect CPU installation, socket contact problems, excessive or uneven cooler mounting pressure, disconnected CPU power, or BIOS incompatibility with the installed processor.
Because the CPU contains functions used during memory and PCIe initialization, a processor-related problem can sometimes produce a DRAM or VGA diagnostic indicator instead of an obvious CPU error.
The Graphics Card Was Removed or Upgraded
A GPU upgrade can introduce several possible POST problems. The graphics card may not be fully inserted into the PCIe slot, a power connector may not be completely seated, or the power supply configuration may not be appropriate for the new hardware.
Heavy graphics cards can also place significant mechanical stress on the PCIe connection. If the motherboard repeatedly stops at the VGA stage, the GPU should be tested as part of a broader diagnostic process rather than immediately assumed to be defective.
For graphics cards that are not being recognized correctly, see our GPU Not Detected in a Gaming PC guide.
A BIOS Update or Configuration Change Failed
BIOS updates can add processor support, improve memory compatibility, and resolve hardware issues, but a failed or interrupted update can prevent the motherboard from starting correctly.
Incorrect BIOS settings can also cause POST problems, particularly after changing memory profiles, CPU tuning parameters, PCIe settings, or other advanced configuration options.
Clearing the CMOS may restore default settings in some situations, but it does not repair corrupted firmware or an underlying hardware failure.
A Power Event or PSU Problem Occurred
A sudden shutdown, surge, unstable power condition, or failing power supply can cause a gaming PC to stop POSTing. Even when fans and RGB lighting still operate, the power supply may not be delivering stable power to every required rail or component.
This is another reason why visible power should not be treated as proof that the PSU is functioning correctly.
A Component or Motherboard Circuit Has Failed
POST failures can also occur without any recent upgrade or configuration change. Motherboard power circuits, memory channels, PCIe connections, CPUs, graphics cards, RAM modules, and other components can develop faults over time.
When the PC consistently stops at the same POST stage even after basic checks, component-level testing may be necessary to determine whether the problem originates from the motherboard or another part of the system.
Our Gaming PC Motherboard Repair guide explains some of the motherboard-level faults that can prevent a system from operating normally.
How to Troubleshoot a Gaming PC That Won’t POST
When a gaming PC will not POST, troubleshooting should be performed systematically. Replacing components based only on a debug LED or POST code can become expensive and may not solve the actual problem.
Before changing hardware, record what the computer is doing. Note which debug LED remains illuminated, which POST or Q-Code appears, whether the system restarts repeatedly, and whether the behavior changed after an upgrade, BIOS adjustment, cleaning, or hardware installation.
1. Allow the System Time to Complete Memory Training
Modern DDR5 systems may require additional time to train memory, especially after installing RAM, clearing the CMOS, updating the BIOS, or changing memory settings.
During this process, the motherboard may remain on the DRAM indicator for longer than expected or restart several times. Interrupting the process repeatedly can make troubleshooting more difficult.
If hardware was recently changed, allow the motherboard sufficient time to complete its initialization process before assuming the system has failed.
2. Check All Power Connections
Verify that the motherboard 24-pin ATX connector and CPU EPS power connectors are fully seated. If a dedicated graphics card is installed, inspect its required PCIe or 12V-2x6 power connection as well.
A connector can appear installed while still not being completely seated. This is particularly important after transporting the computer or working inside the case.
3. Reseat and Test the RAM
If the motherboard stops on the DRAM indicator, power the system down completely before inspecting the memory modules.
Verify that each DIMM is fully seated and installed in the motherboard manufacturer’s recommended slots. If necessary, testing one compatible memory module at a time can help determine whether the problem follows a specific module or slot.
However, remember that a DRAM light does not prove that the RAM itself is defective. The motherboard, CPU, socket contact, BIOS, and memory controller can all affect memory initialization.
4. Inspect and Reseat the Graphics Card
If the motherboard stops at VGA, inspect the graphics card installation and power connections. A GPU that has shifted slightly in the PCIe slot may prevent proper initialization.
Large modern graphics cards are particularly heavy, and movement during transportation can place stress on the PCIe slot or card connection.
If your system uses a PCIe riser cable, that cable should also be considered during troubleshooting because it adds another connection between the motherboard and graphics card.
5. Disconnect Unnecessary Hardware
A useful diagnostic technique is to reduce the gaming PC to the minimum hardware required to attempt POST.
This may involve temporarily disconnecting unnecessary storage devices, USB accessories, RGB controllers, expansion cards, and other peripherals while leaving only the essential components required for startup.
If the system begins POSTing after a device is removed, components can be reintroduced individually to identify what is causing the startup failure.
6. Clear the CMOS When Appropriate
If the POST problem began after changing BIOS settings, CPU tuning parameters, memory timings, XMP/EXPO settings, or other configuration options, clearing the CMOS may restore the motherboard to its default configuration.
The correct CMOS reset procedure varies by motherboard. Follow the instructions provided by the motherboard manufacturer rather than shorting pins or removing components without confirming the proper procedure.
7. Check the Exact Debug Code in the Motherboard Manual
If your motherboard has a POST or Q-Code display, record the code where the system consistently stops and compare it with the manual for the exact motherboard model.
The code should be used together with the symptoms and other diagnostic information. It should not be treated as an automatic instruction to replace the component associated with that stage of POST.
8. Stop Swapping Parts When the Failure Is Not Clear
If basic checks do not identify the cause, repeatedly replacing expensive components can create additional problems and make the original failure harder to isolate.
At this point, controlled testing with known-good components and electrical diagnostics may be necessary. This is especially important when the same symptom could originate from the motherboard, CPU, RAM, graphics card, or power supply.
Diagnostic Tip: Take a photo or short video of the motherboard debug LEDs or POST display before changing anything. The sequence and final code can provide useful diagnostic information if the system behaves differently later.
When a Debug LED Points to the Wrong Component
One of the biggest mistakes when diagnosing a gaming PC that will not POST is assuming that the component named by the motherboard debug LED must be defective.
Debug LEDs indicate the stage of POST where the motherboard encountered a problem. They do not always identify the component responsible for causing that problem.
This distinction becomes especially important when several components depend on each other during initialization.
A DRAM Light Can Be Caused by More Than RAM
If the DRAM LED remains illuminated, testing the memory modules is a logical first step. However, the RAM is only one part of the memory subsystem.
Memory initialization also depends on the motherboard, CPU memory controller, DIMM slots, BIOS configuration, and electrical connections between the processor and motherboard.
For example, poor contact at the CPU socket can interfere with a memory channel and cause the motherboard to stop at DRAM even when the memory modules themselves are working correctly.
A VGA Light Does Not Automatically Mean the GPU Is Dead
The same problem occurs with VGA indicators. A motherboard that cannot initialize the graphics card may illuminate the VGA LED, but the actual cause could involve the PCIe slot, motherboard circuitry, CPU PCIe lanes, GPU power delivery, a riser cable, or the graphics card itself.
This is why testing the GPU in another compatible system—or testing the original system with a known-good graphics card—can provide much more useful information than the LED alone.
For a deeper look at this type of diagnosis, see our Motherboard vs. Graphics Card Failure diagnosis guide.
A CPU Light Can Originate From the Motherboard
CPU indicators can also be misleading. The processor requires correct power delivery, compatible firmware, proper socket contact, and functioning motherboard circuitry before initialization can complete.
A motherboard fault around the CPU power or socket area may therefore produce a CPU debug light even when the processor itself is functional.
Multiple Debug LEDs Can Appear During Normal POST
It is also important to distinguish a normal POST sequence from an actual failure. During startup, some motherboards briefly illuminate CPU, DRAM, VGA, and BOOT indicators as each stage is checked.
Seeing these lights turn on temporarily does not necessarily indicate a problem. The more useful clue is an LED that remains illuminated while the system stops progressing.
The Entire System Has to Be Diagnosed
POST diagnostics are most effective when debug indicators are combined with component testing, known-good hardware, visual inspection, power measurements, and an understanding of what occurred before the failure.
This becomes particularly important with high-end gaming PCs, where replacing a motherboard, CPU, or graphics card unnecessarily can be extremely expensive.
The goal is not simply to identify which LED is illuminated. The goal is to determine why the motherboard cannot complete that stage of POST.
How We Diagnose a Gaming PC That Won’t POST
When basic troubleshooting does not identify why a gaming PC cannot complete POST, the next step is a controlled hardware diagnosis. At this stage, the goal is to determine whether the failure originates from the motherboard, CPU, RAM, graphics card, power delivery, BIOS, or another connected device.
At Prime Tech Support, we approach no-POST problems by testing the system as a whole rather than replacing the component associated with the first debug light or error code.
Documenting the POST Failure
We first observe how the system behaves from the moment power is applied. This includes checking the motherboard’s CPU, DRAM, VGA, and BOOT indicators, recording POST or Q-Codes, and noting whether the system restarts, shuts down, freezes at a specific stage, or changes behavior between startup attempts.
If the motherboard produces beep codes, those patterns can also be documented and compared with the manufacturer’s information for the specific board.
Testing With a Minimal Hardware Configuration
Unnecessary devices can be disconnected so the system can be tested with only the hardware required to attempt POST. This reduces the number of variables and can reveal whether an attached storage device, expansion card, USB device, RGB controller, or other peripheral is interfering with startup.
From there, components can be reintroduced systematically rather than disconnected and replaced randomly.
Testing RAM, GPU, CPU, and Motherboard Interaction
When a debug indicator points toward RAM, graphics, or CPU initialization, the related components must be tested in context.
Known-good compatible hardware can be especially useful. For example, testing a suspected graphics card in another compatible system can help determine whether the failure follows the GPU. Installing a known-good GPU in the original gaming PC can provide additional evidence about the motherboard and PCIe path.
The same type of controlled comparison can be performed with compatible RAM and other components when appropriate.
Checking Power Delivery
A gaming PC can illuminate LEDs and spin its fans even when power delivery is not functioning correctly under the conditions required for POST.
Diagnosis may therefore include checking the PSU, motherboard power inputs, CPU power delivery, GPU power connections, and other relevant circuits rather than assuming that visible power confirms a healthy power supply.
Inspecting the Motherboard
If external components test correctly but the system still cannot complete POST, the motherboard may require closer inspection.
Problems involving the CPU socket, PCIe circuitry, memory channels, damaged connectors, power-delivery components, corrosion, previous repair attempts, or other board-level faults can produce POST symptoms that resemble failed RAM, CPU, or GPU hardware.
When a motherboard fault is suspected, see our Gaming PC Motherboard Repair guide for more information about motherboard-level diagnosis and repair.
Gaming PC stuck on a CPU, DRAM, VGA, or BOOT light? Prime Tech Support provides professional gaming PC diagnostics in Miami to identify the actual source of POST and startup failures before expensive components are replaced unnecessarily.
Can a Gaming PC Fail POST After Working Normally?
Yes. A gaming PC can work normally for months or years and then suddenly fail to complete POST. When there has been no recent upgrade or configuration change, the failure often requires more careful diagnosis because there is no obvious event that explains what happened.
Components can deteriorate over time, electrical connections can become unreliable, and problems that were previously intermittent can eventually prevent the system from starting altogether.
Intermittent Problems Can Become Permanent
Before a complete no-POST condition develops, some gaming PCs show earlier warning signs such as occasional startup failures, random restarts, memory errors, crashes, or needing multiple attempts before reaching the BIOS.
These symptoms can indicate an intermittent hardware or power-delivery problem that eventually becomes severe enough to stop POST completely.
If the PC still reaches Windows but crashes primarily during gaming, the diagnostic process is different. See our Gaming PC Passes Stress Tests but Still Crashes During Games guide for that type of failure.
Heat and Repeated Thermal Cycling Can Affect Hardware
Gaming systems regularly move between idle temperatures and much higher temperatures under load. Over time, repeated heating and cooling can contribute to stress on electrical connections and components.
This does not mean that every no-POST failure is caused by heat, but thermal history can be relevant when diagnosing an older high-performance system—particularly one that has experienced overheating or poor cooling.
Our CPU overheating guide explains common cooling-related symptoms and causes in more detail.
Power Supply Problems Can Develop Gradually
A power supply does not always fail by becoming completely dead. A deteriorating PSU may still provide enough power for motherboard lighting and fans while failing to provide stable power under the conditions required for hardware initialization.
This can create confusing symptoms because the gaming PC appears to have power even though the startup sequence cannot complete normally.
Motherboard Faults Can Appear Without Warning
Motherboard problems can also develop without an obvious external event. Power-delivery components, memory-related circuitry, PCIe connections, firmware, connectors, or other board-level circuits may develop faults that interfere with POST.
When a previously reliable gaming PC suddenly becomes stuck on the same debug LED or POST code, the diagnostic indicator provides an important clue—but component testing is still necessary to determine what actually failed.
When Should You Get Professional Gaming PC Diagnostics?
Many basic POST problems can be traced to a loose connection, incorrectly seated RAM, an improperly installed graphics card, or a BIOS configuration issue. However, if the gaming PC continues to stop during POST after these basic checks, additional troubleshooting can quickly become difficult without known-good components and proper diagnostic equipment.
Professional diagnostics may be appropriate when:
- The same CPU, DRAM, VGA, or BOOT LED remains illuminated after basic troubleshooting.
- The motherboard repeatedly stops on the same POST or Q-Code.
- The PC enters a continuous restart or boot loop before reaching the BIOS.
- Known-good RAM or a known-good graphics card does not resolve the problem.
- The system stopped POSTing after a power event or unexpected shutdown.
- The motherboard may have damaged CPU socket contacts, PCIe circuitry, memory channels, or power-delivery components.
- The PC contains expensive hardware and replacing parts simply to test them would be costly.
- The system has already been partially diagnosed or repaired without identifying the original failure.
A Correct Diagnosis Can Prevent Unnecessary Parts Replacement
Modern gaming PCs contain several interconnected components that participate in POST. A problem with one part of the system can cause the motherboard to stop while initializing another.
This is why replacing the component named by a debug LED is not always the correct solution. A VGA light does not guarantee a failed graphics card, a DRAM light does not guarantee bad RAM, and a CPU light does not automatically mean the processor needs to be replaced.
A proper diagnosis should determine whether the failure follows the suspected component or remains with the motherboard and system configuration.
Board-Level Problems Require Deeper Testing
If the CPU, RAM, GPU, and power supply test correctly but the gaming PC still cannot POST, the problem may be located on the motherboard itself.
At that point, further diagnosis may involve inspecting power rails, CPU socket connections, memory circuitry, PCIe communication, firmware behavior, and other motherboard-level functions.
For systems where the motherboard itself may be responsible, our Gaming PC Motherboard Repair guide explains the types of faults that can require professional board-level diagnostics.
Gaming PC powers on but won’t POST?
If your system is stuck on a CPU, DRAM, VGA, or BOOT light, repeatedly stops on a POST code, or cannot reach the BIOS, Prime Tech Support can diagnose the system to determine which component or circuit is actually causing the failure.
Gaming PC Blog by Gamer Techs in Miami
Ver todo-

A failed or corrupted BIOS can leave a gaming PC with a black screen, no POST, debug LEDs, or continuous...
Gaming PC BIOS Corruption: Symptoms, Failed Updates & Recovery...
A failed or corrupted BIOS can leave a gaming PC with a black screen, no POST, debug LEDs, or continuous...
-

A gaming PC can power on with fans and RGB working but still fail POST. Learn how to interpret CPU,...
Gaming PC Won’t POST? Understanding Motherboard Debug LEDs, Q-...
A gaming PC can power on with fans and RGB working but still fail POST. Learn how to interpret CPU,...
-

PCIe 5.0 ofrece el doble de ancho de banda teórico que PCIe 4.0, pero ¿se traduce eso en un mejor...
PCIe 5.0 vs PCIe 4.0 para gaming: ¿Mejora realmente el rendimi...
PCIe 5.0 ofrece el doble de ancho de banda teórico que PCIe 4.0, pero ¿se traduce eso en un mejor...


SAME-DAY REPAIRS
Gaming PC Diagnostic
Fast tech support for Gaming Computers. We exceed customer expectations and ensure satisfaction.
Our Most Popular Gaming PC Repairs in Miami
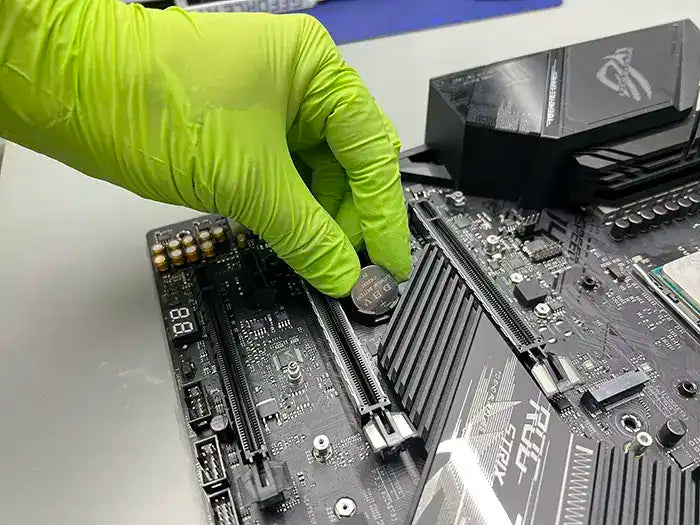


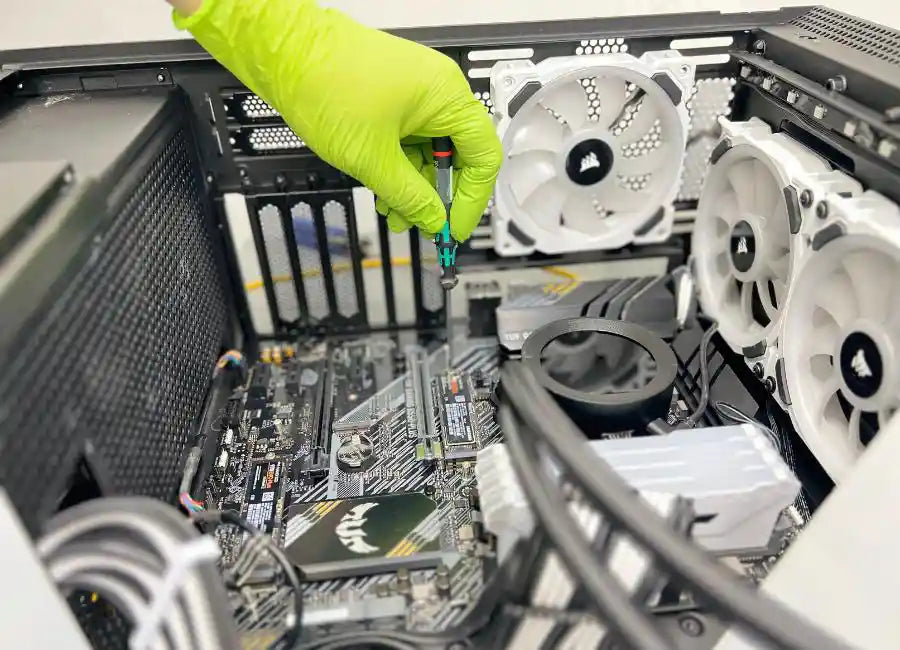
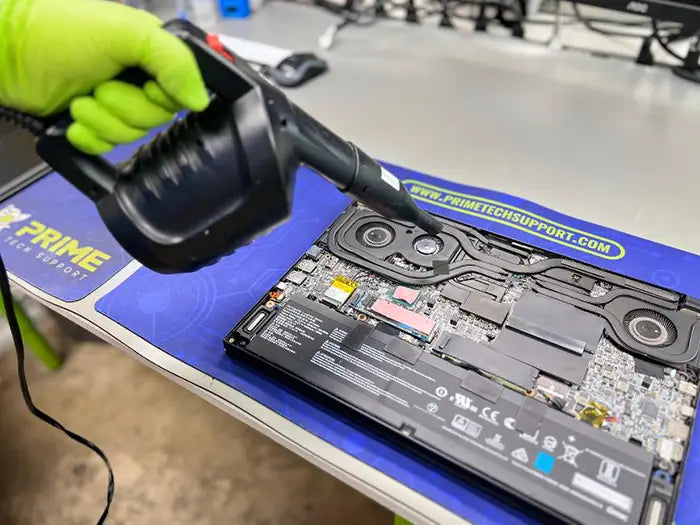
From our Gaming PC Customers in USA
Amazing work there very smart techs, anything you need done explain and your wish will be granted. I needed my power supply optimization, and the tech had no issues doing it. Thank you so much for the support. Click here to read the review on Google
 Joshua Sewell Miami, FL
I brought in my gaming PC for high CPU temperature issues. I was beyond pleased with the service I received. They kept me informed through out the diagnostic process and repair by sending pictures and also the diagnostic reports. The location is super clean and the staff and tech experts were super friendly, polite, and informative through out the process. I was informed they do gaming pc builds and offer a lot services and maintenance for gaming PCs, which is good to know and have in the miami area. Their services are reasonably priced. Highly recommend and will be coming back for any future needs. Click here to read the review on Yelp
 Jennifer Miami, FL
This is the place for any of your gaming pc build needs. I recently purchased a 4090 Founders edition graphics card and a LIAN LI XL case and needed them to transfer my components from my old case to my new case along with my new graphics card. I called Prime tech support, and they were excited to do the install Darian and Augustus greeted me when I arrived and finished the job the same day! Darian was the tech that did the installation, and he did an amazing job and offered to run some tests for me when I came to pick it up in person, to show my PC was running at a premium level. I recommend this place for any gaming pc needs and builds.
I am attaching pictures of my build.
thank you! Click Here to read th review on Google
