CPU Overheating: Causes, Symptoms, and How to Fix Thermal Throttling
CPU overheating happens when the processor produces more heat than the cooling system can remove. When the CPU gets too hot, it protects itself by lowering clock speed. This is called thermal throttling, and it can cause FPS drops, stutter, loud fans, crashes, or shutdowns during gaming.
In most cases, CPU overheating is not caused by a failed processor. It is usually caused by a problem in the heat path: dust blocking airflow, old thermal paste, an incorrectly mounted or undersized cooler, poor case airflow, a failing AIO pump, hot room temperature, or aggressive BIOS power settings.
The most important sign is the pattern: CPU temperature rises, fans or pump respond, CPU clock speed drops, and FPS falls at the same time. If those signals happen together, the issue is likely CPU thermal throttling rather than a weak CPU.
Your gaming session starts smoothly. Twenty minutes in, the fans get loud. FPS starts dropping. The game stutters. Maybe the PC shuts off entirely. This is the pattern of CPU thermal throttling — one of the more common performance problems in gaming PCs, and often one of the most fixable.
Most people who experience this assume the CPU is failing. In practice, the processor itself is usually intact. The cooling system, airflow, or thermal interface is what typically needs attention.
Repair Bench Example
A gaming PC starts normally, then loses FPS after 15–20 minutes because dust has blocked the radiator or the cooler mount is not making even contact with the CPU lid. Replacing the CPU would not fix that — restoring the heat path would.
The diagnostic key is watching four signals together: CPU temperature, fan or pump behavior, CPU clock speed, and FPS. Temperature alone does not prove throttling — the pattern of all four changing together is what confirms it.
Table of Contents
CPU Overheating: Quick Answer for Gamers
What CPU Overheating Means
CPU overheating happens when the processor generates more heat than the cooling system can remove. Every CPU has a thermal limit — a maximum junction temperature set by the manufacturer. When the processor approaches that limit, it triggers protective mechanisms that reduce its own performance to prevent hardware damage.
This is not typically a sign the CPU is broken. It usually means the heat path between the CPU and the outside of the case is insufficient, blocked, degraded, or not matched to the processor's heat output.
What Thermal Throttling Means
Intel describes thermal throttling as a built-in protection mechanism that lowers CPU clock speed when the processor reaches its thermal limit, such as TJ Max or Tcase. In simple terms, the CPU slows itself down to reduce heat and prevent damage.
Thermal throttling is not the failure — it is the warning sign. The real problem is that the cooling system is not removing heat fast enough to keep the processor below the temperature that triggers throttling.
For gamers, this matters because lower CPU clock speed means the processor completes less work per second. That can lead to lower FPS, worse 1% lows, stutter, and uneven frame pacing until the heat issue is fixed.
Important Diagnostic Rule
Thermal throttling is not the root problem. It is the CPU reacting to a cooling issue. The real cause is usually dust, poor airflow, degraded thermal paste, cooler mounting problems, AIO pump issues, or aggressive power settings.
When High CPU Temperature Becomes a Real Problem
A warm CPU under full gaming load is normal. Modern processors are designed to run warm during boost. The issue is when temperatures consistently approach or reach the thermal limit, causing clock speed reductions that show up as dropped FPS, stutter, or instability.
The pattern that commonly confirms a problem: temperature rises under load → fans respond loudly → CPU clocks drop → FPS drops → performance briefly recovers → the cycle repeats. If you see this cycle, treat it as a cooling problem first before drawing conclusions about the CPU itself.
Common CPU Overheating Symptoms
Use this table to match what you are experiencing to a likely cause before reading further.

| Symptom | What It Often Indicates | Urgency |
|---|---|---|
| FPS drops after 10–20 minutes of gaming | Thermal throttling under sustained load | Medium — diagnose cooling |
| Fans suddenly loud or always at maximum speed | Cooling system working harder to manage heat | Low–Medium — monitor temps |
| PC shuts down during gaming | Thermal protection shutdown | High — stop heavy load testing immediately |
| Stutter that was not present at session start | Clock speed reduction from accumulated heat | Medium — check temps and clocks |
| High temperatures at idle, no heavy tasks running | Cooler mount issue, pump failure, or background load | Medium–High — inspect cooling |
| Frequent freezes or blue screens under load | Thermal instability or related system issue | High — stop and diagnose |
| CPU clocks visibly dropping in monitoring software | Confirmed thermal throttling pattern | Medium — follow fix sequence |
Sudden FPS Drops While Gaming
When the CPU starts throttling, clock speeds drop. Lower clocks mean the processor prepares fewer frames per second, which shows up as reduced FPS and worsened frame delivery times. The drop is often gradual at first — barely noticeable — and worsens as temperatures remain elevated. Lowering graphics settings may provide marginal relief, but if CPU throttling is the root cause, the GPU was not the limit.
Diagnostic Note
If performance is poor immediately from the start of a session, check settings, drivers, background app load, and CPU/GPU utilization before focusing on heat. If performance starts fine and gets worse after 15–20 minutes, thermal throttling is the more likely explanation.
Loud Fans or Fans Running at Full Speed
Loud fans are the cooling system responding to rising heat. The system's fan curve increases speed as temperature climbs. If the fans are running at maximum and temperatures are still rising, the cooling system is being outpaced — commonly because dust is blocking airflow, the cooler is undersized, thermal paste has degraded, or, in AIO systems, pump flow has slowed.
Random Crashes, Freezes, or Shutdowns
Important Stop Point
If the PC is shutting down under gaming load, stop testing. Identify the pattern — when does it shut down, how quickly, and what temperatures are visible before shutdown — then follow the diagnostic steps below before applying any fix. Continued load testing on a system that shuts down under stress is not a diagnostic strategy.
Thermal protection shutdowns occur when the CPU, motherboard, or both cut power before temperatures reach potentially damaging levels. This is protective behavior. Identifying the thermal cause matters more than continuing to test.
Stutter After 10–30 Minutes of Gameplay
This is the most recognizable thermal throttling signature in gaming: fine at session start, noticeably worse over time. As heat builds, the CPU approaches its thermal limit, throttles, and performance degrades. The pattern of fine-then-worsening distinguishes thermal throttling from driver issues, background load, or hardware instability that is present from the start.
High Idle Temperatures
Elevated temperatures at idle — when no demanding tasks are running — often point to a cooler mount problem, a failing AIO pump, heavy background load from software, or blocked intake airflow. Idle temperatures are worth checking before running gaming load, because a processor that starts warm will reach its thermal limit much faster under gaming stress.
How to Check CPU Temperature Safely
Before applying any fix, confirm whether the CPU is actually overheating and whether thermal throttling is occurring. Guessing at a fix without confirming the cause is how unnecessary parts get replaced.

Use Reliable Monitoring Tools
For AMD systems: Ryzen Master is an official monitoring utility that provides real-time per-core clock rates, temperature, and voltages — a manufacturer-supported option for AMD CPU owners.
For broader system monitoring across both Intel and AMD platforms: HWiNFO is widely used to track CPU temperature, clock speed, power draw, and fan or pump RPM simultaneously. It allows logging over a gaming session, which makes it easier to catch the throttling pattern after the fact.
For a baseline without any software: most motherboards display CPU temperature in the BIOS hardware monitor. This is useful for checking idle temperature before loading an operating system.
What to Watch — Temperature, Clocks, and FPS Together
| Signal | What to Watch | Why It Matters |
|---|---|---|
| Idle temperature | Temperature with no demanding tasks running | A warm idle means the CPU reaches its limit faster under gaming load |
| Temperature at load start | Temperature within the first 2–3 minutes of gaming | Establishes a baseline before heat accumulates |
| Temperature after 20–30 minutes | Temperature during sustained gaming | This is when thermal throttling typically appears if cooling is insufficient |
| CPU clock speed under load | Core frequency in HWiNFO or Ryzen Master | Clock drops confirm throttling — sustained high temps alone do not |
| FPS or frame-time behavior | FPS during the same monitoring period | FPS dropping as clocks drop confirms the throttling-to-performance link |
| Fan and pump RPM | Fan and pump speeds under load | Zero or low pump RPM is a red flag; fans not responding to heat is another |
Why Safe Temperature Numbers Depend on Your CPU
There is no single universal temperature threshold that applies across all CPUs. Thermal limits vary by CPU model, platform, generation, and workload type. The more useful signal is whether temperature is causing clock speed reductions — if it is, the cooling system needs attention regardless of the exact temperature reading.
If you want to check the specific TJ Max or Tcase value for your processor, look up your exact CPU model on AMD's or Intel's official product page. Some AMD Ryzen processors list Tjmax values on their product pages; Intel references TJ Max and Tcase in its throttling guidance for each product line. Do not apply mobile processor thermal limits to desktop processors — they differ significantly.
Need Help Identifying the Real Heat Source?
If you are seeing high temperatures but are not sure whether the CPU, cooler, GPU, or case airflow is the actual issue, professional diagnostics can identify the root cause before any parts are replaced.
Explore Gaming PC Repair ServicesWhat Causes CPU Overheating?
Understanding the cause of CPU overheating is more important than applying random fixes. CPU overheating usually happens because heat cannot move efficiently from the processor to the cooler, through the case, and out into the room. The weak point can be dust, airflow, thermal paste, cooler mounting, fan behavior, AIO pump flow, BIOS power settings, room temperature, or background CPU load.
Two PCs can both show high CPU temperatures and need completely different repairs.
A dust-clogged desktop may only need cleaning. A PC with instant temperature spikes may have an AIO pump or cooler contact problem. A system that overheats mainly in summer may be affected by room temperature or poor placement. A clean gaming PC that still runs hot may have degraded thermal paste, uneven cooler pressure, an undersized CPU cooler, or aggressive BIOS power behavior.
The key is to match the symptom pattern to the likely cause before replacing parts. Use the table below to identify what is most likely causing the overheating and what to check first.
| Cause | Common Symptom | Safe First Step |
|---|---|---|
| Dust buildup in heatsink or radiator | Fans get louder, temperatures climb under load, performance gradually worsens over months | Clean filters, fans, heatsinks, and radiators with compressed air |
| Poor case airflow | Temperatures rise gradually and the inside of the case feels warm even after cleaning | Check intake/exhaust fan layout, cable routing, and case placement |
| Old or degraded thermal paste | High temperatures continue even after dust cleaning and airflow checks | Inspect paste condition or book service if you are not comfortable removing the cooler |
| Weak or incorrectly mounted cooler | High temperatures under load with little improvement after cleaning | Check cooler rating, socket fit, mounting pressure, and contact with the CPU |
| AIO pump failure or blockage | Temperature spikes very quickly after load starts | Check pump RPM in monitoring software and seek professional service if flow is questionable |
| Overclocking or aggressive BIOS power limits | High temperatures during boost workloads, especially on newer CPUs | Review BIOS settings and restore defaults if unsure |
| Hot room or enclosed desk placement | Temperatures are worse in summer or when the PC is inside a cabinet | Improve room ventilation and move the PC to a more open location |
| Background software load | CPU usage is already high at idle before gaming starts | Check Task Manager for launchers, updates, recording tools, browser tabs, or malware |
Dust Buildup and Blocked Airflow
Dust is one of the most common causes of CPU overheating in gaming PCs because it slowly blocks the surfaces that move heat out of the system. It collects in intake filters, CPU heatsink fins, AIO radiator fins, fan blades, and exhaust vents.
This type of overheating usually develops gradually. The PC may run normally for months or years, then fans get louder, temperatures climb faster, and FPS starts dropping during longer gaming sessions. Because the decline is slow, many users do not connect the issue to cooling until thermal throttling becomes obvious.
What to Check First
Inspect intake filters, radiator fins, heatsink fins, and fan blades. If they are coated with dust, clean them before replacing hardware.
Technician insight: A dusty cooler can make a healthy CPU behave like a weak or failing one. The processor may be fine — the heat simply cannot leave the cooler efficiently.
Poor Case Airflow
Even clean components can overheat if the case does not move air properly. The CPU cooler needs a steady supply of cooler intake air and a clear path for warm air to leave the case.
Poor airflow often happens when the case has limited front intake, blocked vents, missing intake fans, weak exhaust, or cables sitting directly in the airflow path. A PC placed inside an enclosed desk or too close to a wall can also trap hot air around the case.
A useful test is the side-panel check: if temperatures drop noticeably with the side panel removed, case airflow is likely contributing to the overheating.
For a structured approach to intake and exhaust fan layout, see our best airflow setup for a gaming PC guide.
Old or Poorly Applied Thermal Paste
Thermal paste sits between the CPU heat spreader and the cooler base plate. Its job is to fill microscopic gaps so heat can transfer efficiently from the CPU into the cooler.
When thermal paste dries out, shrinks, spreads unevenly, or was applied poorly from the start, heat transfer becomes less efficient. The CPU may then run hot even if the fans, case airflow, and cooler are working.
| Pattern | What It May Suggest |
|---|---|
| The PC overheated from the beginning | Poor paste application or uneven cooler mounting |
| The PC ran fine for years, then gradually got worse | Degraded paste, dust buildup, or cooler wear |
| Temperatures stay high after cleaning | Paste, mount, cooler capacity, or pump behavior needs checking |
Our guide to thermal paste for gaming PCs explains when replacement typically helps and what affects heat transfer between the CPU and cooler.
Weak or Incorrectly Mounted CPU Cooler
A CPU cooler can cause overheating in two ways: it may be too weak for the processor, or it may not be mounted correctly.
Modern CPUs can draw more power during boost than many users expect. If the cooler is not rated for the CPU’s sustained heat output, temperatures can rise quickly under gaming or productivity loads. Even a strong cooler can underperform if mounting pressure is uneven, the base plate is not flush with the CPU, or the bracket/backplate is installed incorrectly.
An incorrect mount can look like several other problems: bad thermal paste, a weak cooler, or even a failing AIO. The real issue is that the heat path between the CPU and cooler is broken.
What to Check First
Look for loose mounting, uneven pressure, incorrect brackets, rocking movement, or a paste spread pattern that shows poor contact.
AIO Pump or Liquid Cooler Problems
AIO liquid coolers move heat by circulating coolant from the CPU block to a radiator. If the pump fails, slows down, or loses proper flow because of trapped air or internal blockage, the CPU loses its main cooling path.
This problem behaves differently from dust buildup. Dust-related overheating usually gets worse gradually over a gaming session. A pump or flow issue can cause CPU temperature to spike very quickly after load begins — sometimes within the first minute or two.
Radiator fans can still spin even if the pump is failing. Spinning fans only prove the radiator fans are powered; they do not prove coolant is moving. Pump RPM should be checked separately in monitoring software or motherboard utilities.
Technician insight: If temperatures spike almost immediately under load and the radiator fans are spinning, do not assume the AIO is working. Check pump RPM, pump noise, tube temperature difference, and whether the CPU block is properly mounted.
Sealed AIO pump failures are usually not DIY-repairable. If pump RPM is missing or abnormal, one tube is much hotter than the other, or pump noise changes noticeably, professional assessment or cooler replacement is the safer path.
Overclocking, Power Limits, and Aggressive Boost Behavior
Overclocking increases CPU voltage and frequency, which increases heat output. But overheating can also happen on systems that were never manually overclocked.
Some motherboards use aggressive default profiles, enhanced boost settings, or removed power limits that allow the CPU to draw more power than the cooler was selected to handle. The CPU may technically be working as configured, but the cooling system cannot keep up with the extra heat.
This is especially important on newer CPUs that boost aggressively under load. A cooler that seems fine at idle may become overwhelmed during sustained gaming, shader compilation, streaming, or CPU-heavy workloads.
Hot Room or Poor PC Placement
The room around the PC matters. Every cooling system depends on the temperature of the air it pulls in. If the room is hot, the PC is inside an enclosed desk, or the rear exhaust is pushed against a wall, the cooler has less thermal headroom.
This can explain why a PC runs fine in winter but overheats in summer, or why temperatures improve when the system is moved to a more open area.
What to check first:
- Is the PC inside a cabinet or under a closed desk?
- Is the rear exhaust blocked by a wall?
- Are front or bottom intakes blocked?
- Is the room noticeably hot during gaming?
- Does performance improve with better room ventilation?
For a broader guide to full-system heat management, including placement, airflow, and environmental factors, see our how to prevent PC overheating while gaming guide.
Background Software Load
Not every temperature problem starts with the cooler. Sometimes the CPU is already under load before the game even launches.
Antivirus scans, game launcher updates, recording software, streaming tools, RGB utilities, browser tabs, and malware can all raise CPU usage at idle. A CPU that starts a gaming session already busy will heat up faster and have less performance headroom.
What to check first:
Open Task Manager before launching the game and look for unusual CPU usage. If the CPU is already working hard at idle, close unnecessary background apps and retest temperatures before assuming the cooling system is the problem.
Diagnostic Rule
If CPU usage is high at idle, fix the background load first. If CPU usage is normal at idle but temperatures still climb under gaming load, the issue is more likely cooling, airflow, thermal paste, cooler mounting, or pump behavior.
CPU Thermal Throttling Explained
CPU thermal throttling is when the processor slows itself down because it is getting too hot. The CPU reduces clock speed, and sometimes power draw, to lower heat output and protect the system. This protection keeps the processor safer in the short term, but it also reduces gaming performance until the cooling problem is fixed.
For gamers, thermal throttling matters because CPU clock speed affects how quickly the processor can prepare frames. When the CPU slows down, the game may feel less smooth even if the average FPS still looks acceptable. The most common signs are FPS drops, weaker 1% lows, stutter, inconsistent frame pacing, and performance that gets worse the longer the session continues.
The important point: thermal throttling is not the root problem. It is the CPU reacting to a heat problem. The real issue is usually dust, poor airflow, old thermal paste, uneven cooler contact, an undersized cooler, AIO pump problems, or aggressive power settings.
What Happens During Thermal Throttling?
During normal gameplay, the CPU boosts clock speed when the game needs more processing power. That extra speed creates more heat. If the cooler can remove that heat efficiently, performance stays stable.
When the CPU gets too hot, it lowers its clock speed to reduce heat output. This means the processor completes less work per second. In gaming, that can affect:
- frame preparation
- game logic
- physics
- AI behavior
- draw calls
- background tasks
- instructions sent to the GPU
This is why a throttling CPU can make a powerful GPU look underused. The GPU may be ready to render more frames, but the CPU is no longer preparing frames fast enough.
A simple way to understand it:
| Normal Cooling | Thermal Throttling |
|---|---|
| CPU boosts under load | CPU slows down under heat |
| Clock speed stays stable | Clock speed drops |
| FPS and frame pacing stay consistent | FPS drops and stutter may appear |
| GPU receives work consistently | GPU may wait on the CPU |
| Performance remains predictable | Performance gets worse as heat builds |
How Thermal Throttling Feels in Games
Thermal throttling usually does not feel like one instant crash at first. It often feels like performance slowly falling apart.
A common pattern looks like this:
- The game starts normally.
- FPS is stable for the first few minutes.
- CPU temperature climbs as heat builds inside the system.
- Fans get louder.
- CPU clock speed drops.
- FPS falls or frame times become uneven.
- Stutter appears.
- Performance may briefly recover, then drop again.
This is why many users describe the problem as:
- “My FPS drops after 20 minutes.”
- “The game starts smooth, then becomes choppy.”
- “My fans get loud and performance gets worse.”
- “Lowering graphics settings does not fully fix the stutter.”
- “My GPU usage drops even though the game is still running badly.”
To understand why CPU speed affects FPS and frame delivery, see our CPU effect on gaming performance guide.
Why 1% Lows Often Show the Problem First
Average FPS can hide thermal throttling. A game may still average 90 FPS, but if the CPU is periodically slowing down, the game can feel choppy.
That is why 1% lows and frame-time consistency matter. They show how stable the experience feels, not just how many frames the system produces on average.
When thermal throttling begins, you may notice:
| What Changes First | What It Means |
|---|---|
| 1% lows drop | The game is becoming less consistent |
| Frame-time spikes appear | Frames are not being delivered evenly |
| Average FPS drops later | The problem is getting more severe |
| GPU usage falls in some moments | The CPU may not be feeding the GPU consistently |
This is one reason CPU overheating can be mistaken for a GPU problem. The graphics card may not be the issue — it may simply be waiting for the throttled CPU.
How to Confirm CPU Thermal Throttling
Do not diagnose thermal throttling from temperature alone. A hot CPU is not automatically throttling. You need to watch temperature, clock speed, and performance together during the same gaming session.
| Signal | What to Watch | What It Confirms |
|---|---|---|
| CPU temperature rising under load | Monitor during real gameplay, especially after 20–30 minutes | Heat is building during sustained use |
| CPU clock speed dropping | Watch core frequency in HWiNFO or Ryzen Master | The CPU is reducing performance |
| FPS or frame times getting worse | Compare FPS and frame-time behavior during the same period | The heat issue is affecting gameplay |
| Fans or pump responding loudly | Watch fan RPM or pump RPM if available | The cooling system is reacting to heat |
| Pattern repeats over time | Performance drops, briefly stabilizes, then drops again | The issue is likely thermal rather than a one-time spike |
Decision Rule
If CPU temperature rises, CPU clock speed drops, and FPS or frame times get worse at the same time, CPU thermal throttling is likely.
If FPS drops but CPU temperature and clock speed remain stable, do not assume CPU overheating. Check GPU temperature, PSU stability, RAM usage, storage behavior, drivers, and background software before focusing on the CPU.
Thermal Throttling vs Other Performance Problems
Thermal throttling has a specific pattern: performance usually starts fine, then gets worse as heat builds.
| Symptom Pattern | More Likely Cause |
|---|---|
| FPS drops after 15–30 minutes | CPU or GPU thermal throttling |
| FPS is bad immediately when the game starts | Settings, drivers, CPU/GPU limit, RAM, or background software |
| PC shuts down under load | Thermal protection, PSU issue, or hardware instability |
| Stutter happens only during loading or asset streaming | Storage, RAM, or game engine behavior |
| GPU usage drops while CPU clocks drop | CPU throttling may be limiting frame delivery |
| GPU temperature is high but CPU is stable | GPU overheating, not CPU overheating |
Why Throttling Protects the CPU but Does Not Fix the Problem
Thermal throttling is protective, but it is not a repair. It helps prevent the CPU from staying at unsafe heat levels, but it does not remove the reason the processor got too hot in the first place.
If the cooling system cannot keep up, throttling will return every time the PC reaches sustained load.
The lasting fix is to restore the heat path:
| Heat Path Problem | Likely Fix |
|---|---|
| Dust blocks heatsink or radiator fins | Clean filters, fans, heatsinks, and radiators |
| Case traps warm air | Improve intake, exhaust, cable routing, and placement |
| Thermal paste is degraded | Reapply paste correctly |
| Cooler mount is uneven | Reseat cooler with proper contact pressure |
| Cooler is undersized | Upgrade to a cooler matched to the CPU |
| AIO pump is failing | Test pump behavior and replace the unit if needed |
| BIOS power limits are too aggressive | Restore safe defaults or review power behavior |
The goal is not just to make the CPU stop throttling for one session. The goal is to make cooling stable enough that the processor can maintain its intended performance during long gaming sessions.
DIY vs Professional: Know Before You Open the Case
Some overheating fixes are safe, accessible, and low-risk. Others — particularly for laptops, AIO issues, and repeated shutdowns — risk creating new damage if approached incorrectly. Use this table before touching anything.
| Issue | Safe DIY? | Better as Professional Service? |
|---|---|---|
| Dust in filters, fans, or external vents | Yes — compressed air is low risk | If system is heavily clogged or rarely cleaned, service ensures it is fully addressed |
| Poor case placement or blocked external vents | Yes — adjust placement freely | Not typically needed |
| CPU fan not spinning, needs replacement | Check and confirm only | Replacement — especially on pre-built or laptop systems |
| AIO pump failure | No — sealed units are not DIY-repairable | Yes — replacement usually required |
| Thermal paste replacement on a desktop | Reasonable for experienced users | Recommended for first-timers or unfamiliar builds |
| Thermal paste replacement on a gaming laptop | No — requires full disassembly | Yes — laptop teardown is model-specific and risky |
| BIOS power-limit issue | Restore defaults only | Do not adjust individual voltage or power values without guidance |
| PC shuts down repeatedly under load | Stop testing immediately | Yes — diagnose before any further use under load |
How to Fix CPU Overheating Safely
Work through this sequence in order. Start with the safest, most accessible steps before moving to anything that requires opening the case or touching the cooler. After each step, recheck temperatures under the same gaming load before proceeding.
| Step | Action | Safe For | What to Look For |
|---|---|---|---|
| 1 | Stop heavy load testing if PC is shutting down | All users | Note when it shuts down, how quickly, and any visible temperatures before shutdown |
| 2 | Clean dust from filters, fans, heatsinks, and radiators | Desktop users; cautious laptop users (external vents only) | Improved temperatures under load; less fan noise |
| 3 | Test airflow by removing the side panel temporarily | All desktop users | If temps drop noticeably with panel off, airflow is contributing |
| 4 | Check fan and pump operation | Desktop users | All fans spinning with RPM values; AIO pump reporting RPM; no zero-RPM readings |
| 5 | Reseat or inspect cooler mounting | Experienced desktop users | Even contact across the CPU lid; no rocking; correct bracket and backplate |
| 6 | Reapply thermal paste | Experienced desktop users; otherwise book service | Temperature improvement after repaste; clean coverage across the heat spreader |
| 7 | Upgrade cooler if undersized for the CPU | Desktop users matching socket and TDP | Temperatures stabilizing below throttling threshold under sustained load |
| 8 | Review BIOS power limits — restore defaults only | Experienced users | Lower temperatures if power limit was set above cooler capacity |
Step 1: Stop Heavy Load Testing if the PC Is Shutting Down
If the PC is shutting down under gaming load, do not continue running heavy workloads to "test" what happens. The shutdown is already telling you the system reached its thermal protection threshold. Identify the pattern: when does it happen, how many minutes into a session, and what temperatures are visible before shutdown. Then follow the diagnostic steps before applying any fix.
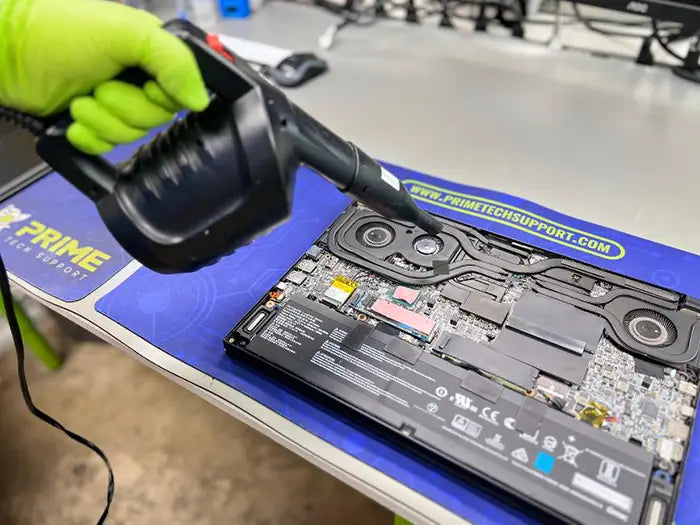
Step 2: Clean Dust From Filters, Fans, Heatsinks, and Radiators

Use compressed air to clean dust from intake filters, CPU heatsink fins, AIO radiator fin arrays, fan blades, and exhaust vents. Hold fans still while directing compressed air through them — avoid spinning fan blades rapidly with air pressure. Work in a ventilated space. This step often resolves overheating in systems that have not been cleaned in a long time.
After cleaning, recheck temperatures under the same gaming load that triggered the problem. If temperatures are meaningfully lower, cleaning was a significant contributor. If temperatures are largely unchanged, the cause lies elsewhere — paste, mount, pump, airflow design, or cooler capacity.
Step 3: Test Case Airflow
Remove the side panel and run the same gaming load. If temperatures drop noticeably, case airflow is a contributing factor.
Improve airflow by ensuring intake fans pull cool air in from the front or bottom, exhaust fans push hot air out from the rear or top, cable runs do not block airflow channels, and the PC is not placed inside a closed desk cabinet or against a wall with no exhaust clearance.
For additional airflow optimization strategies, see our best airflow setup for a gaming PC guide.
Step 4: Check CPU Fan and AIO Pump Behavior
Confirm the CPU fan is reporting RPM values in monitoring software and that speeds respond to load. For AIO coolers, confirm the pump is reporting RPM. A pump reporting zero or very low RPM is a strong indicator of pump failure.
Listen for changes in pump sound — gurgling, clicking, or a notably quiet pump compared to how it sounded previously can indicate air in the loop or pump degradation.
Technician Insight
AIO pump issues on sealed units generally require professional assessment or full replacement. One tube being noticeably hotter than the other at the block end — with the CPU under load — is a practical indicator of reduced coolant flow.
Step 5: Inspect and Reseat the CPU Cooler
If cleaning and airflow checks do not resolve the issue, the cooler mount is worth inspecting. Remove and reseat the cooler using the correct bracket, backplate, and even diagonal tightening pressure.
An uneven mount leaves one edge of the cooler base plate slightly raised, creating an air gap that significantly increases thermal resistance — even with fresh paste. Check the paste spread pattern after removal: an uneven contact patch often reveals a mounting problem.
Step 6: Reapply Thermal Paste
If the cooler mount looks correct and temperatures are still high, thermal paste degradation may be the issue.
Reapplying thermal paste requires removing the cooler, cleaning both surfaces completely, and applying fresh paste before reseating. This is straightforward for experienced desktop users. For those who have not done it before, or for any gaming laptop, professional service is the safer path.
Applying too much paste, using the wrong type, or leaving old paste residue on either surface all reduce effectiveness.
Learn more in our guide to thermal paste for gaming PCs.
Step 7: Upgrade the CPU Cooler if It Is Undersized
If the cooler is rated below the CPU's TDP, or if it was adequate for previous boost behavior but the CPU now draws more power under sustained load, a cooler upgrade may be the correct fix.
Our guide on choosing the right CPU cooler explains how to match TDP ratings, socket compatibility, case clearance, and RAM clearance.
Step 8: Review BIOS Power Limit Settings — Restore Defaults Only
If overclocking was applied or the motherboard BIOS was configured to remove power limits, restoring the CPU's rated defaults reduces heat output.
Restore defaults rather than adjusting individual power values if you are not certain of the correct settings for your specific CPU and platform. On some boards, aggressive "enhanced" or "multicore enhancement" profiles are enabled by default and may push the CPU beyond its thermal design range.
Still Experiencing Thermal Throttling?
If cleaning, airflow changes, and fan checks do not resolve thermal throttling, the cooler mount, thermal paste condition, pump health, or BIOS power settings likely need professional testing before further parts are replaced.
Explore Gaming PC Repair ServicesCPU Overheating in Gaming Laptops vs Desktop PCs
CPU overheating is different in gaming laptops than in desktop PCs. A desktop usually has more airflow, larger coolers, replaceable fans, and easier access for cleaning or repasting. A gaming laptop has a compact chassis, smaller fans, narrow exhaust fins, shared CPU/GPU heat pipes, and model-specific disassembly steps.
That means a fix that is simple on a desktop — like reseating a cooler, replacing a fan, or reapplying thermal paste — can be much riskier on a laptop. Laptop cooling repairs often require removing the bottom cover, disconnecting small cables, lifting the heatsink, cleaning old paste, and reinstalling everything with even pressure. One wrong step can damage flex cables, fan connectors, clips, or the heatsink contact surface.
| Factor | Desktop PC | Gaming Laptop |
|---|---|---|
| Cooling access | Components are usually visible and easier to remove | Most cooling parts require opening the chassis |
| Dust cleaning | Filters, fans, heatsinks, and radiators are easier to clean | External vent cleaning is safer; internal cleaning usually requires teardown |
| Thermal paste replacement | Reasonable for experienced users | Professional service recommended for most users |
| Fan replacement | Usually straightforward with standard connectors | Often requires partial or full disassembly |
| Airflow improvement | Fan layout, cable management, and case placement can be changed | Mostly limited to hard-surface placement, vent cleaning, and cooling pads |
| CPU/GPU cooling design | CPU and GPU often have separate or larger cooling paths | CPU and GPU often share heat pipes and tight exhaust paths |
| Service risk | Lower if the user is experienced | Higher due to small connectors, clips, and model-specific layouts |
Why Gaming Laptops Run Hotter
Gaming laptops run hotter because they pack a powerful CPU and GPU into a much smaller space than a desktop. The fans are smaller, the heatsink surface area is limited, and the exhaust paths are narrow. There is less room for heat to spread out and less airflow volume to remove it.
Many gaming laptops also use a shared cooling system. The CPU and GPU may connect to the same heat pipe assembly, so heavy GPU load can raise the temperature around the CPU cooling path. That is why a laptop may throttle even when the CPU is not the only component producing heat.
Dust also affects laptops quickly. Narrow vent fins can clog over time, reducing airflow through the heatsink. When that happens, the fans may get louder, temperatures rise faster, and performance can decline during longer gaming sessions.
Technician Insight
A laptop that starts gaming normally but slows down after 15–30 minutes often has heat buildup inside the cooling system. The issue may be dust, degraded thermal paste, weak fan performance, or shared CPU/GPU heat saturation — not a failing processor.
Many gaming laptops can show thermal degradation after 12–24 months of heavy use without internal cleaning, especially if they are used on fabric surfaces, in dusty rooms, or in warm environments.
Safe Laptop Cooling Steps Without Opening the Chassis
These steps are the safest starting point because they do not require laptop disassembly:
| Safe Step | Why It Helps |
|---|---|
| Use the laptop on a hard, flat surface | Soft surfaces block bottom intake vents and trap heat. |
| Clean external intake and exhaust vents gently | Dust near vents restricts airflow before it even reaches the heatsink. |
| Keep the rear and side exhaust vents clear | Hot air needs space to leave the chassis. |
| Check the manufacturer’s control software | Some laptops allow fan mode or performance profile adjustments. |
| Test with a cooling pad or raised stand | Raising the laptop can improve intake airflow on some models. |
| Close heavy background apps | Less CPU load means less heat before the game even starts. |
When using compressed air, spray from a short distance and avoid forcing the nozzle directly into the vent. The goal is to loosen surface dust, not push debris deeper into the heatsink or overspin small fans.
Laptop Cooling Repairs That Usually Need Professional Service
Some laptop overheating fixes should not be treated like desktop fixes. Internal laptop cooling work is much more delicate because the heatsink, fans, battery cable, display cable, Wi-Fi antenna wires, and ribbon cables may be close together.
Professional service is safer for:
- internal dust cleaning
- thermal paste replacement
- thermal pad replacement
- fan replacement
- heatsink removal
- liquid metal cleanup or replacement
- repairs involving stripped screws, broken clips, or damaged fan connectors
Laptop disassembly varies heavily by model. An ASUS ROG, MSI, Razer Blade, Lenovo Legion, HP Omen, Acer Predator, and Alienware system may all use different screw layouts, heatsink designs, fan connectors, and thermal pad placement. That is why generic laptop repaste advice can be risky.
Stop Point
If the fix requires removing the heatsink, disconnecting internal cables, or exposing the motherboard, treat it as professional service unless you already have experience with that exact laptop model.
Desktop Fixes Are More Accessible
Desktop overheating is usually easier to diagnose and repair because the cooling system is larger and more accessible. You can often see the CPU cooler, case fans, radiator, dust filters, and airflow path without major disassembly.
Desktop users can usually start with:
- cleaning dust filters and fans
- checking fan direction
- testing with the side panel removed
- confirming CPU fan or AIO pump RPM
- inspecting cooler mounting pressure
- replacing thermal paste if experienced
- upgrading the CPU cooler if it is undersized
The key difference is risk. A desktop gives more room to work and fewer fragile hidden connectors. A laptop often requires a model-specific teardown, so the safe DIY boundary is much earlier.
Quick Rule: Desktop vs Laptop CPU Overheating
| If You Have… | Best First Move |
|---|---|
| Desktop with loud fans and gradual temperature increase | Clean dust, check airflow, monitor temperatures |
| Desktop with instant temperature spikes | Check cooler mount, AIO pump, or fan behavior |
| Laptop overheating only while gaming | Improve placement, clean external vents, check fan profile |
| Laptop slowing down after 15–30 minutes | Suspect internal dust, paste degradation, or shared heat saturation |
| Laptop needing repaste or internal cleaning | Use professional service unless experienced with that exact model |
| Any PC shutting down repeatedly under load | Stop testing and diagnose before further use |
The main takeaway: desktops give you more safe DIY options. Gaming laptops need more caution because cooling repairs are compact, model-specific, and easier to damage during disassembly.
When CPU Overheating Is Not Actually the CPU
FPS drops, stutter, loud fans, and shutdowns during gaming are not exclusive to CPU overheating. Before concluding the CPU is the problem, check whether other components are contributing to — or fully responsible for — the symptoms.
GPU Overheating Can Look Identical
GPU heat and CPU heat produce nearly identical gameplay symptoms: FPS drops, stutter, loud fans, and crashes. A GPU running near its thermal limit throttles its own clock speed, reducing rendered frames per second — which looks the same as CPU throttling from the player's perspective.
Monitor both CPU and GPU temperatures simultaneously during gameplay to determine which component is elevated.
Our GPU overheating fix guide covers the GPU-side diagnosis if temperatures point there.
PSU Instability Can Cause Shutdowns
Power supply instability under gaming load can cause sudden shutdowns and crashes that feel exactly like thermal shutdowns — but with normal or borderline temperatures at the point of failure.
If the system shuts down under load and temperatures appear reasonable before the shutdown event, PSU capacity, cable condition, and component age are worth investigating alongside cooling.
Background Software Can Raise CPU Load and Temperature
Software that raises CPU utilization before gaming begins — antivirus scans, launcher updates, recording or streaming tools, excessive browser tabs — reduces the thermal headroom available during gaming.
A processor that is already working hard before the game launches reaches its thermal limit earlier and leaves less sustained performance available.
Check Task Manager at idle to confirm whether background processes are consuming meaningful CPU resources before attributing the problem to cooling alone.
RAM or Storage Issues Can Cause Stutter
Not all gaming stutter is temperature-related. RAM running outside its supported speed, single-channel RAM in a dual-channel system, or a storage device with latency or reliability issues can produce stutter and performance inconsistency that is not thermal in origin.
The key differentiator: if stutter correlates with CPU temperature rising and clock speed dropping, the cause is thermal. If stutter appears with stable CPU temperature and normal clock speed, look elsewhere.
Diagnostic Reminder
Do not assume every FPS drop is a CPU problem. Temperature, clock speed, utilization, and timing patterns together provide a much more accurate diagnosis than temperature alone.
When to Get Professional CPU Cooling Diagnostics
Stop DIY Troubleshooting If You See These Signs
Stop and seek professional help immediately if any of these apply.
- The PC shuts down repeatedly under any gaming or load scenario
- Temperatures spike to the thermal limit within seconds of load starting — not minutes
- Liquid is visible near the CPU cooler or anywhere on the motherboard
- The AIO pump makes unusual noise or reports zero RPM in monitoring software
- The cooler appears physically loose, rocking, or incorrectly mounted
- A burning smell is present from the case
- The laptop requires internal disassembly to address the cooling issue
- Safe fixes — cleaning, airflow improvement, fan checks — have been applied and thermal throttling continues
What a Professional CPU Cooling Diagnostic Should Assess
- CPU cooler mount — even contact pressure, correct bracket, no rocking or gap
- Fan operation — RPM response to temperature, blade condition, cable integrity
- AIO pump RPM, coolant flow behavior, radiator condition, and tube temperature difference
- Thermal paste coverage and condition after cooler removal
- Case airflow — intake/exhaust balance, cable routing, obstruction
- BIOS power limit settings and CPU boost behavior under real sustained load
- CPU and GPU temperatures simultaneously during extended gaming
- RAM pressure and storage health as differential causes
- Full system stability under controlled thermal load conditions
Why Diagnostics Prevent Unnecessary Part Replacement
CPU overheating rarely requires CPU replacement unless diagnostics confirm CPU-level or platform-level damage. The processor itself is usually intact — the cooling system is the problem.
A professional thermal service — cleaning, paste replacement, cooler inspection — is typically far less expensive than replacing a CPU, AIO, or motherboard based on an unconfirmed assumption.
Diagnosing the specific cause first gives you a reliable repair path and prevents spending money on parts that were never the issue.
Not Sure What's Causing the Heat?
Professional diagnostics can verify whether the problem is airflow, thermal paste, cooler mounting, AIO performance, BIOS power settings, or another component before you spend money on replacement parts.
Book a Gaming PC DiagnosticFinal Verdict: How to Stop CPU Overheating and Thermal Throttling
Final Recommendation Summary
| Situation | First Step | Why |
|---|---|---|
| Fans loud, temps high, gradual performance decline over months | Clean dust from heatsinks, radiator, and filters | Dust buildup is the single most common cause in gaming PCs |
| Side panel off lowers temperatures noticeably | Improve case airflow — fan layout and cable routing | Airflow design is a confirmed contributing factor |
| Temps spike within seconds of load starting | Check AIO pump RPM and fan behavior immediately | Pump failure or fan fault — not a cleaning or paste problem |
| High idle temperature with a clean case | Inspect cooler mount and thermal paste condition | The thermal interface between CPU and cooler may be compromised |
| Overclocking or high power limits in BIOS | Restore BIOS defaults before replacing cooling hardware | Excess power draw generates excess heat — fix the source first |
| Gaming laptop with gradually declining performance | Professional service — internal access required | Laptop disassembly risk is high; internal cleaning and repaste are service-level tasks |
| Safe fixes applied, throttling continues | Professional cooling diagnostic | Specific cause needs hands-on confirmation before parts are replaced |
Fix the Cooling First
CPU overheating is a cooling and airflow problem in the vast majority of cases. Dust, poor airflow, degraded thermal paste, inadequate cooler capacity, and pump or fan issues are the root causes — not the CPU itself. The processor rarely needs replacement, but that conclusion should come from diagnostics, not assumption.
Verify Temperatures After Each Change
After each step in the fix sequence, check temperatures again under the same gaming load. This confirms whether the change made a measurable difference and whether further steps are needed. Skipping verification makes it impossible to know which step actually resolved the problem.
Get Help When Safe Fixes Have Not Resolved the Issue
If cleaning, airflow improvement, and fan checks have been completed and thermal throttling continues, the remaining causes — paste condition, cooler mount, pump health, or power behavior — typically require hands-on inspection that monitoring software alone cannot confirm.
Need Help Diagnosing CPU Overheating?
Still dealing with CPU overheating, loud fans, FPS drops, stutter, or thermal shutdowns? Prime Tech Support can inspect your cooling system, test fan and pump behavior, clean the PC, replace thermal paste, check airflow, and confirm whether cooling repair or an upgrade is the right next step before you replace parts.
Book a Gaming PC Diagnostic Explore Gaming PC Repair Services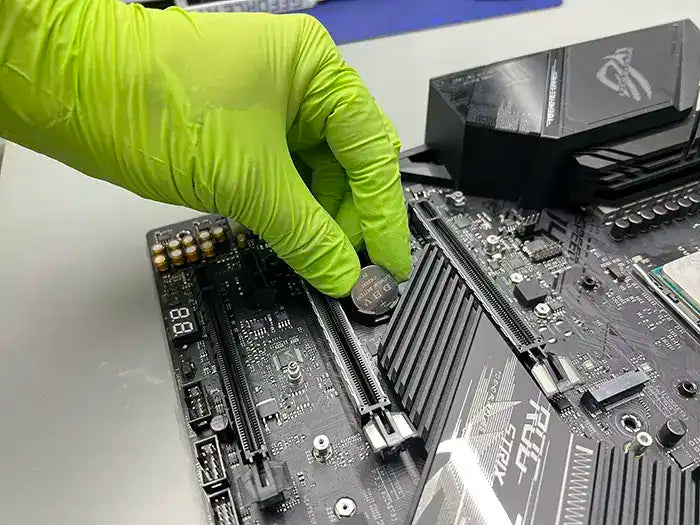
Explora más
Compartir este
CPU Overheating: Fix Thermal Throttling Fast
What causes CPU overheating while gaming?
What is CPU thermal throttling?
How do I know if my CPU is overheating?
What CPU temperature is too high?
Can old thermal paste cause CPU overheating?
Can CPU overheating damage my gaming PC?
When should I get professional help for CPU overheating?
¿Su PC gamer no funciona? Obtenga diagnóstico experto y opciones de reparación
Si su PC para juegos está experimentando problemas después de la instalación de una CPU, una actualización o un cambio de hardware, obtener un diagnóstico adecuado es el primer paso. Problemas como pines de CPU doblados, daños en el zócalo de la placa base o incompatibilidad de la BIOS pueden impedir que su sistema arranque.
En Prime Tech Support, nos especializamos en diagnósticos avanzados de PC para juegos y reparaciones a nivel de hardware, incluyendo problemas complejos que otras tiendas quizás no puedan resolver.
¿En Miami? Obtenga servicio local de reparación de PC gamer
Nuestro equipo está listo para ayudarle. Ofrecemos diagnósticos profesionales y tiempos de respuesta rápidos para PC para juegos y sistemas de alto rendimiento.
¿No está en Miami? Utilice nuestro servicio de reparación nacional por correo
Ofrecemos reparaciones seguras por correo a nivel nacional para PC gaming, incluyendo problemas de CPU y placa base. Ya sea que esté lidiando con pines doblados, daños por instalación o problemas de arranque, nuestros técnicos pueden diagnosticar y reparar su sistema de forma segura.
Trabajamos con clientes en todo Estados Unidos, ofreciendo comunicación clara, manejo cuidadoso y resultados profesionales.
Nuestros servicios de reparación de PC Gamer más populares en Miami


Opiniones de nuestros clientes de PC Gamer en EE. UU.
Increíble trabajo allí técnicos muy inteligentes, cualquier cosa que necesites explicar y tu deseo será concedido. Necesitaba la optimización de mi fuente de alimentación, y el técnico no tuvo problemas para hacerlo. Muchas gracias por el apoyo. Haz clic aquí para leer la reseña en Google
 Josué Sewell Miami, Florida
Traje mi PC para juegos por problemas de alta temperatura de la CPU. Estaba más que satisfecho con el servicio que recibí. Me mantuvieron informado durante todo el proceso de diagnóstico y reparación mediante el envío de imágenes y también los informes de diagnóstico. La ubicación es súper limpia y el personal y los expertos en tecnología fueron muy amables, educados e informativos durante todo el proceso. Me informaron que fabrican PC para juegos y ofrecen muchos servicios y mantenimiento para PC para juegos, lo cual es bueno saber y tener en el área de Miami. Sus servicios tienen un precio razonable. Lo recomiendo encarecidamente y volveré para cualquier necesidad futura. Haga clic aquí para leer la reseña en Yelp
 Jennifer Miami, Florida

Este es el lugar para cualquiera de sus necesidades de construcción de PC para juegos. Recientemente compré una tarjeta gráfica 4090 Founders edition y una carcasa LIAN LI XL y las necesitaba para transferir mis componentes de mi carcasa anterior a mi nueva carcasa junto con mi nueva tarjeta gráfica. Llamé al soporte técnico de Prime y estaban emocionados de hacer la instalación. Darian y Augustus me saludaron cuando llegué y terminé el trabajo el mismo día. Darian fue el técnico que hizo la instalación, e hizo un trabajo increíble y se ofreció a hacerme algunas pruebas cuando fui a recogerlo en persona, para demostrar que mi PC funcionaba a un nivel superior. Recomiendo este lugar para cualquier necesidad y compilación de PC para juegos.
Adjunto fotos de mi construcción.
¡gracias! Haga clic aquí para leer la reseña en Google