GPU Maintenance Guide: Cleaning, Repasting, and Extending Performance
If your games are suddenly stuttering, your fans sound like a jet engine, or your GPU temperatures are creeping past safe limits, you’re not alone. GPU maintenance is one of the most overlooked but critical parts of keeping a gaming PC running smoothly.
Many users assume performance drops mean it’s time to upgrade. In reality, issues like dust buildup, degraded thermal paste, or poor airflow are often the real culprits. These are fixable problems if handled correctly.
For gamers in South Florida dealing with heat and humidity, these issues show up even faster. That’s why regular maintenance or professional help through services like gaming PC repair and optimization can make a measurable difference in both performance and lifespan.
Let’s break down exactly how GPU maintenance works, why it matters, and when it’s smart to handle it yourself versus calling in professionals.
Table of Contents
What Causes GPU Overheating and Performance Drops?
GPU overheating is typically caused by dust buildup, degraded thermal paste, and poor airflow, which force the graphics card to throttle performance to prevent damage leading to FPS drops, crashes, and reduced lifespan.
The Real Problem Behind GPU Overheating
Over time, even high-end GPUs begin to lose performance not because they’re outdated, but because their cooling efficiency quietly degrades.
The most common culprits include:
- Dust accumulation blocking heatsinks and fans
- Thermal paste drying out and losing conductivity
- Restricted airflow inside the PC case
- High ambient temperatures (especially in places like Miami)
These issues don’t just raise temperatures they directly impact how your GPU performs under load.
The Technical Reason This Happens
Modern GPUs from NVIDIA and AMD are designed with built-in thermal protection systems. Once temperatures approach critical thresholds, the GPU automatically reduces its clock speeds—a process known as thermal throttling.
According to NVIDIA’s official documentation:
GPUs dynamically adjust performance to maintain safe operating temperatures, reducing speed when thermal limits are reached.
This means:
- Higher temps = Lower performance
- Lower clock speeds = Reduced FPS
- Sustained heat = Long-term hardware degradation
Even a 5–10°C increase can noticeably impact performance in demanding games or rendering workloads.
| GPU Temperature Range | Status | Performance Impact | Recommended Action |
|---|---|---|---|
| 30–50°C | Idle/Optimal | No impact | Normal operation |
| 60–75°C | Normal Load | Stable performance | No action needed |
| 75–85°C | Warm | Minor throttling possible | Monitor & improve airflow |
| 85–90°C | Hot | Noticeable FPS drops | Clean GPU & check cooling |
| 90°C+ | Critical | Severe throttling, instability | Immediate maintenance required |
This table helps users clearly understand when temperatures become a real problem—and what to do next.
Experiencing overheating, loud GPU fans, or FPS drops? Professional diagnostics can identify whether your issue is caused by airflow, thermal paste degradation, VRAM heat, or deeper hardware instability.
Explore Gaming PC Repair ServicesPractical Solutions That Actually Fix GPU Overheating (Not Just Temporary Relief)
Most guides stop at “clean your GPU,” but that’s only part of the equation. Real performance recovery comes from addressing airflow dynamics, thermal transfer efficiency, and system-wide heat management.
If you're dealing with recurring heat issues during gameplay, understanding how to prevent PC overheating while gaming gives you a broader system-level perspective—especially when GPU temps are only part of the problem.
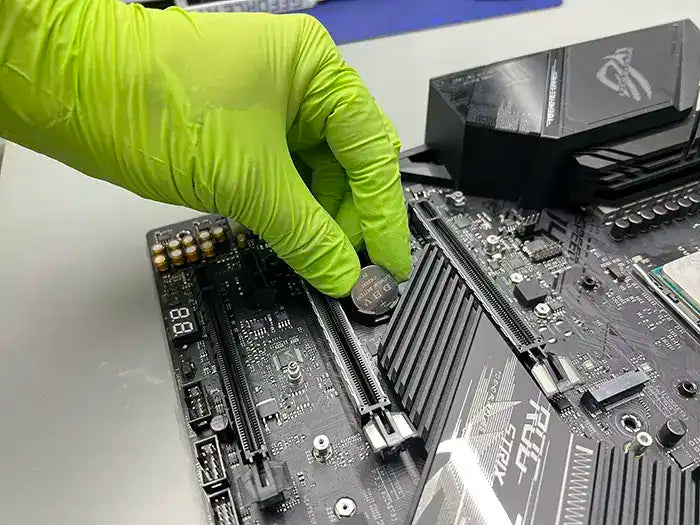
1. Perform a Targeted Deep Clean (Not Just Surface Dusting)
Blowing air into your case often pushes dust deeper into the GPU heatsink instead of removing it.
What actually works:
- Remove the GPU from the case
- Use compressed air + soft anti-static brush to clean between heatsink fins
- Hold fans in place to prevent overspinning (which can damage bearings)
Why it matters:
Heatsink fins are where heat is dissipated. If they’re clogged, your cooling system is effectively “choked,” no matter how fast the fans spin.
2. Replace Thermal Paste AND Inspect Thermal Pads
Most users only think about thermal paste—but thermal pads (cooling VRAM and power delivery components) degrade too.
What actually works:
- Replace GPU thermal paste with a high-quality compound
- Inspect thermal pads for:
- Dryness
- Cracking
- Uneven compression
Why it matters:
Even if your GPU core is cool, overheating VRAM can cause:
- Stuttering
- Texture loading issues
- Random crashes under load
This is a hidden cause of performance drops many DIY attempts completely miss.
3. Optimize Case Airflow (The #1 Overlooked Issue)
A perfectly clean GPU will still overheat inside a poorly ventilated case.
What actually works:
- Create a front-to-back airflow path
- Use:
- Intake fans (front/bottom)
- Exhaust fans (rear/top)
- Ensure cables are not blocking airflow
Pro tip:
Positive air pressure (more intake than exhaust) helps reduce dust buildup over time.
Why it matters:
Your GPU doesn’t cool itself—it relies on the case environment. If hot air is trapped inside, temps will climb no matter what.

4. Adjust Fan Curves for Real-World Loads
Default GPU fan curves prioritize quiet operation—not cooling performance.
What actually works:
- Use software like MSI Afterburner
- Increase fan speed earlier (e.g., ramp up at 60–70°C instead of 80°C)
Why it matters:
Preventing heat buildup is easier than cooling it down after it spikes.
5. Undervolt Your GPU (Advanced but Powerful)
Modern GPUs often run at higher voltages than necessary for stability.
What actually works:
- Slightly reduce voltage while maintaining clock speeds
- Test stability with benchmarks
Why it matters:
- Lower voltage = less heat
- Same performance with better efficiency
This is one of the most effective ways to reduce temps without losing FPS.
6. Control Your Environment (Especially in Hot Climates)
Ambient temperature directly affects GPU cooling performance.
What actually works:
- Keep room temperature below 75°F if possible
- Avoid placing PCs in enclosed desks or against walls
- Clean more frequently in humid/dusty environments
Why it matters:
Cooling systems can only lower temps relative to the surrounding air. If your room is hot, your GPU will be too.
GPU overheating is rarely caused by a single issue. Long-term performance recovery usually requires a combination of cleaning, thermal maintenance, airflow optimization, and temperature management.
Real-World Insight: What Actually Happens in Neglected Systems
Here’s a scenario that’s far more common than most people expect:
A gamer brought in a high-end RTX system complaining about:
- Sudden FPS drops in Fortnite and Warzone
- Loud fan noise that “wasn’t there before”
- Occasional crashes after 20–30 minutes of gameplay
Initial Assumption
They believed the GPU was “going bad” and were already considering replacing it.
What We Found
After opening the system:
- Heatsink fins were completely packed with dust
- Thermal paste had hardened and cracked
- Thermal pads on VRAM were partially degraded
- Case airflow was restricted due to poor fan placement
GPU temps were hitting 91–94°C under load—well into throttling range.
| Maintenance Action Taken | Problem It Solved | Measured Result / Improvement |
|---|---|---|
| Full deep clean (not just air dusting) | Dust blocking heatsinks and airflow | Lower internal heat buildup |
| Reapplied high-quality thermal paste | Poor heat transfer from GPU die | Core temps stabilized under load |
| Replaced worn thermal pads | VRAM and power component overheating | Eliminated stuttering and random crashes |
| Reconfigured airflow (front intake + proper exhaust) | Hot air trapped inside the case | Consistent cooling across entire system |
| Combined Result | System-wide thermal inefficiency | Temps reduced to 68–72°C FPS increased by 25–35% Fan noise significantly reduced Full system stability restored |
A complete GPU maintenance process—including deep cleaning, thermal paste replacement, thermal pad upgrades, and airflow optimization—can reduce temperatures by over 20°C and improve gaming performance by up to 35%.
How Dust Buildup Impacts GPU Cooling (And Why It’s Worse Than You Think)

Dust isn’t just “dirt” inside your PC it acts like a thermal barrier.
As it accumulates on your GPU’s heatsink and fans, it:
- Traps heat close to critical components
- Blocks airflow pathways designed to remove that heat
- Forces fans to spin faster while becoming less effective
The result? Your GPU runs hotter, louder, and less efficiently—even if everything else is working perfectly.
Technical Insight
GPU cooling systems are engineered around airflow + surface contact.
Here’s how it’s supposed to work:
- Heat transfers from the GPU chip to the heatsink
- Airflow passes through thin metal fins
- Heat is carried away and expelled from the case
When dust builds up between those fins, it disrupts this entire process.
Instead of heat being carried away, it gets trapped and recirculated, dramatically reducing thermal dissipation.
According to the IEEE (Institute of Electrical and Electronics Engineers), effective thermal management is essential for maintaining semiconductor efficiency, preventing performance degradation, and extending hardware lifespan.
IEEE Engineering and Thermal Management Research
Even partial blockage can reduce cooling efficiency enough to trigger thermal throttling under load.
GPU cooling systems rely on airflow moving freely through heatsink fins. Once dust blocks those pathways, temperatures rise quickly and fans become less effective no matter how aggressively they spin.
Practical Solutions
Basic cleaning helps—but technique matters if you want real results.
-
Use compressed air strategically
Short, controlled bursts to push dust out of the heatsink—not deeper inside -
Clean between heatsink fins
This is where most heat transfer happens—and where dust causes the most damage -
Hold fans in place while cleaning
Prevents overspinning, which can damage fan bearings or internal circuits -
Use a soft anti-static brush for stubborn buildup
Especially helpful for compact or older GPUs with dense fin stacks
Real-World Insight (From Field Experience)
In South Florida, dust and humidity accelerate buildup faster than most people expect.
I’ve worked on gaming systems where:
- The GPU looked “lightly dusty” from the outside
- But internally, the heatsink was completely clogged
In one case, that hidden buildup alone caused:
- Temperature increases of 15–20°C
- Constant fan noise at maximum speed
- Noticeable FPS drops during gameplay
After a proper deep cleaning—not just surface dusting:
- Temperatures dropped immediately
- Fan noise normalized
- Performance stabilized without replacing a single part
That’s the moment most users realize the issue wasn’t their GPU—it was airflow being suffocated.
Professional Consideration
If dust has been building up for years, surface cleaning won’t be enough.
Deep buildup often requires:
- Partial or full GPU disassembly
- Internal heatsink cleaning
- Inspection of thermal paste and pads
This is where DIY attempts can go wrong. GPUs are compact, delicate, and expensive—improper handling can damage connectors, fans, or the PCB itself.
Professional servicing ensures:
- Safe disassembly
- Complete dust removal (not just visible areas)
- Restoration of proper airflow and cooling efficiency
Dust buildup inside a GPU blocks airflow and traps heat, reducing cooling efficiency and causing temperatures to rise by up to 20°C—leading to performance drops and increased fan noise. Proper deep cleaning restores airflow and stabilizes performance.
Not sure if your GPU needs deep cleaning or thermal servicing? Professional maintenance can safely restore airflow, reduce temperatures, and prevent long-term hardware stress before permanent damage occurs.
Get Professional GPU MaintenanceWhen and Why You Should Replace GPU Thermal Paste

The Hidden Performance Bottleneck Inside Your GPU
Most users focus on fans and airflow but in reality, one of the biggest performance killers sits between your GPU chip and its heatsink.
Thermal paste is a small component with a massive role: it enables heat to transfer away from the GPU core efficiently. But over time, it doesn’t just degrade—it breaks down at a chemical level, becoming dry, brittle, and far less conductive.
When that happens, heat starts getting trapped exactly where you don’t want it—at the GPU die itself.
This is often the root cause behind systems that suddenly:
- Run hotter without explanation
- Drop FPS during longer gaming sessions
- Sound louder as fans struggle to compensate
If you’re already noticing these symptoms, it may be time to look beyond basic cleaning and consider deeper gaming PC repair and thermal optimization services—especially when standard fixes stop working and temperatures keep climbing.
What’s Actually Happening at the Microscopic Level
Even though your GPU and heatsink look perfectly flat, they’re anything but.
Under magnification, both surfaces are filled with microscopic grooves, pits, and imperfections. Without thermal paste, these gaps trap air—and air is one of the worst conductors of heat.
Thermal paste solves this by:
- Filling those microscopic voids
- Creating a continuous thermal bridge
- Allowing heat to transfer efficiently into the heatsink
According to Intel’s official thermal interface guidance:
Intel Thermal Paste Application Guide
Proper thermal interface material is essential to eliminate air gaps and maximize heat transfer efficiency.
For a deeper breakdown of why thermal paste degradation has such a strong impact on real-world GPU performance—and how it affects long-term stability in gaming systems—you can see a detailed technical explanation here: how thermal paste degradation impacts GPU heat.
But here’s where things go wrong over time:
- Fresh paste → smooth, consistent heat transfer
- Aged paste → cracks, separation, and air pockets
Instead of heat flowing outward, it gets bottlenecked at the core, causing temperatures to rise faster and remain elevated under load.
Thermal paste doesn’t “cool” the GPU directly. Its job is to eliminate microscopic air gaps between the GPU die and heatsink so heat can transfer efficiently into the cooling system.
Clear Signs Your Thermal Paste Is Failing
You don’t need to take your GPU apart to recognize the pattern. Watch for:
- Gradual temperature increases over months or years
- Fans ramping up aggressively—even during moderate use
- FPS drops after 20–30 minutes of gameplay
- Overheating that persists even after cleaning dust
These symptoms point to a critical distinction:
The issue isn’t airflow anymore—it’s heat transfer efficiency.
Practical Solutions That Deliver Real Results
If degraded thermal paste is the problem, these are the solutions that actually restore performance:
-
Replace thermal paste every 2–4 years
Heavy gamers, streamers, or users in hot climates should do it sooner -
Use high-quality thermal compounds
Premium pastes maintain consistency and resist drying longer -
Apply the correct amount and spread
Too little creates gaps
Too much acts as insulation -
Ensure proper mounting pressure
Uneven contact leads to hotspots and inconsistent cooling
This isn’t just maintenance—it’s restoring the core thermal pathway of your GPU.
Real-World Insight: When Repasting Brings a GPU Back to Life
A high-end gaming system came in with what the owner assumed was a failing GPU. The symptoms were clear:
- FPS drops after extended gameplay
- Temperatures reaching 88–92°C
- Fans constantly running at maximum speed
Interestingly, the system was clean—no major dust buildup, good airflow.
But once we opened the GPU, the real issue was obvious:
- Thermal paste had completely dried out and hardened
- Coverage across the GPU die was uneven
- Certain areas had minimal contact with the heatsink
In other words, the cooling system wasn’t failing—the heat was never leaving the chip efficiently.
After a proper repaste using a high-quality compound:
- Load temperatures dropped to 70–74°C
- FPS stabilized across long gaming sessions
- Fan noise decreased dramatically
No new parts. No upgrades. Just restored thermal conductivity.
Degraded GPU thermal paste reduces heat transfer efficiency, causing higher temperatures, louder fans, FPS drops, and thermal throttling. Replacing it correctly can dramatically improve temperatures and restore stable gaming performance.
How to Clean a GPU Safely (Without Damaging It)
The Real Risk Most DIY Guides Don’t Talk About
Cleaning a GPU sounds simple—but it’s one of the easiest ways to accidentally damage your hardware if done incorrectly.
We’ve seen cases where users tried to “quick clean” their system and ended up with:
- Non-spinning fans due to internal damage
- Loose connectors causing intermittent crashes
- GPUs that wouldn’t power on after improper handling
The issue isn’t cleaning itself it’s how the cleaning is done.
What Makes GPUs So Sensitive to Damage
Modern GPUs aren’t just “components”—they’re high-density electronic systems packed into a very small space, operating under tight electrical and thermal tolerances.
Inside that compact design, you’re dealing with:
- Exposed PCB pathways carrying precise electrical signals
- Fragile fan headers and micro-connectors that aren’t designed for repeated handling
- Capacitors and VRMs regulating power delivery in real time
None of these parts are protected the way people assume. There’s no buffer for mistakes—even minor interference can disrupt how the GPU functions.
Graphics cards combine delicate electrical pathways, precision cooling systems, and tightly packed components. Even small mistakes during cleaning can cause overheating, instability, or permanent hardware failure.
The Invisible Threat: Static Electricity (ESD)
Static discharge is one of the most misunderstood risks because you often won’t see or feel it happen.
But at the hardware level, here’s what’s going on:
- A tiny electrostatic discharge can alter or degrade microscopic circuits
- Damage isn’t always immediate—it can cause gradual instability over time
- The GPU may still “work,” but with random crashes, artifacts, or reduced lifespan
This is why professionals treat ESD as a silent failure trigger, not just a rare accident.
Mechanical Stress: The Damage You Can Accidentally Cause
Most physical damage during cleaning doesn’t come from dropping the GPU—it comes from small, repeated mistakes.
For example:
- Letting fans spin freely with compressed air can turn them into tiny generators, sending unintended electrical feedback into the board
- Pressing too hard while cleaning can create microfractures in solder joints
- Slightly shifting components or connectors can lead to intermittent failures that are hard to diagnose
These aren’t dramatic failures—they’re subtle issues that show up later as:
- Random crashes
- Inconsistent performance
- “Unexplained” overheating

Safe GPU Cleaning Method (Step-by-Step Best Practice)
Cleaning a GPU isn’t about rushing through steps—it’s about controlled handling of sensitive hardware. Each step below isn’t just a “what to do,” but why it matters, based on real repair experience.
Step 1: Fully Power Down and Isolate the System
Shut down your PC, switch off the power supply, and unplug it completely.
Why this matters:
Even when a system appears off, residual power can still flow through the motherboard and GPU. This creates a risk of short circuits if tools or air disturb components.
Real-world insight:
We’ve seen systems where users cleaned components in standby mode—resulting in instant board failure when dust shifted across powered circuits.
Step 2: Eliminate Static Before You Touch Anything
Ground yourself using:
- An anti-static wrist strap (best option)
- Or by touching a grounded metal surface before handling components
Why this matters:
Static discharge doesn’t need to be felt to cause damage. It can silently weaken circuits and lead to:
- Random crashes later
- Reduced GPU lifespan
- Intermittent instability that’s hard to trace
Expert perspective:
In professional environments, ESD protection isn’t optional—it’s standard practice because latent damage is one of the hardest problems to diagnose later.
Step 3: Remove the GPU for Proper Access (If You Can)
Carefully remove the GPU from the PCIe slot.
Why this matters:
Cleaning inside the case limits visibility and control. Removing the GPU allows you to:
- Clean heatsinks more thoroughly
- Avoid blowing dust deeper into the system
- Reduce accidental contact with other components
Real-world insight:
Surface-level cleaning inside the case often leaves hidden dust packed inside heatsink fins, which continues to cause overheating.
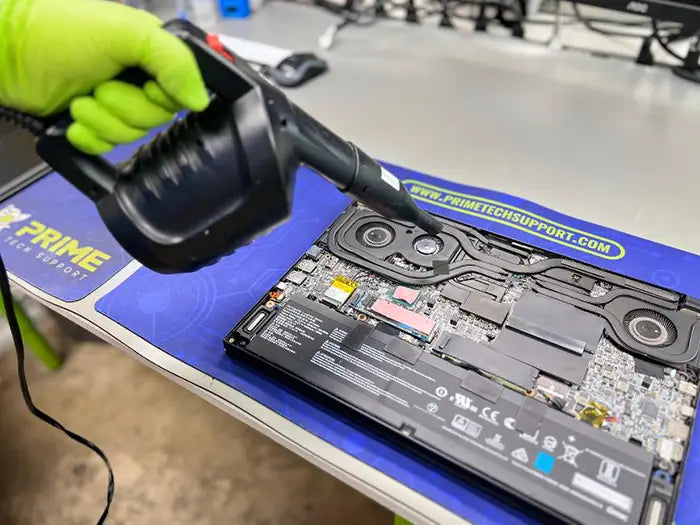
Step 4: Use Controlled Airflow—Not Force
Use compressed air in short, controlled bursts, directing airflow outward from the heatsink.
Why this matters:
Uncontrolled airflow can:
- Push dust deeper into the GPU
- Spread debris across other components
- Create unnecessary mechanical stress
Expert tip:
Think of it as guiding dust out, not blasting it randomly.
Step 5: Stabilize the Fans Before Cleaning
Hold the GPU fans in place while using compressed air.
Why this matters:
When fans spin freely from air pressure, they can:
- Generate electrical feedback into the board
- Damage internal bearings
- Reduce fan lifespan
Real-world case:
We’ve replaced many GPU fans that failed shortly after “simple cleanings” where fans were left spinning uncontrollably.
Step 6: Avoid Liquids Unless You Know Exactly What You’re Doing
Stick to dry cleaning methods unless you’re trained.
Why this matters:
Liquids introduce risks like:
- Residue buildup
- Short circuits
- Corrosion over time
Even isopropyl alcohol, when misused, can:
- Spread contaminants instead of removing them
- Damage surrounding components if overapplied
Why Professional Cleaning Delivers Better Results
By the time most users reach this point, they’ve already tried basic cleaning—or at least considered it. But here’s the reality:
If your GPU is still overheating or hasn’t been properly maintained in years, surface-level cleaning won’t solve the root problem.
What looks like “dust on the outside” is often deep internal buildup and degraded thermal materials that require more than compressed air.
Professional servicing includes:
-
Anti-static handling and proper grounding
Eliminates the risk of silent electrical damage during servicing -
Controlled airflow and precision cleaning tools
Removes dust from inside the heatsink, not just the surface -
Partial or full disassembly (when needed)
Allows access to critical internal cooling pathways -
Thermal system inspection
Evaluates:
- Thermal paste condition
- Thermal pad integrity
- Fan performance and wear
- Airflow efficiency across the system
This ensures the GPU is not just “clean,” but thermally optimized and safe to operate.
Cleaning a GPU safely requires controlling static electricity, avoiding excessive force, and using proper airflow techniques. Improper cleaning can damage fans, connectors, or internal components, making professional handling the safest option for deep maintenance.
Not comfortable opening or cleaning your GPU yourself? Professional GPU maintenance services can safely deep clean, inspect, and optimize your graphics card without risking accidental damage.
Schedule GPU Maintenance ServiceSigns Your GPU Needs Maintenance (Don’t Ignore These)
GPUs almost always show warning signs long before failure happens.The problem? Those signs are often subtle at first—and easy to ignore.
What starts as a small temperature increase or occasional lag can quickly turn into:
- Persistent overheating
- Performance instability
- Permanent hardware damage
Early Warning Signs (And What They Actually Mean)
Here’s what to watch for—and what’s really happening behind the scenes:
| Symptom You Notice | What It Feels Like | What’s Actually Causing It | Real-World Example |
|---|---|---|---|
| Sudden FPS drops | Game feels choppy or inconsistent | Thermal throttling due to rising temps | Smooth 120 FPS drops to 70–80 FPS after 20 minutes |
| Loud or constantly spinning fans | PC sounds like it’s “working too hard” | GPU compensating for heat buildup | Fans hitting 100% even in medium settings |
| GPU temps above 85°C | System feels hot, performance dips over time | Cooling system no longer efficient | Temps climbing from 75°C to 90°C over weeks |
| Screen artifacts or glitches | Flickering, weird textures, visual bugs | VRAM overheating or unstable memory | Random flashes or broken textures in games |
| Crashes during gaming | Game closes or system restarts under load | Thermal instability or power delivery stress | Crashes after 30–40 minutes of gameplay |
Why Timing Matters More Than You Think
Catching these signs early can mean the difference between:
Simple maintenance (cleaning, repasting)
vs
Expensive repair or full GPU replacement
The longer overheating continues:
- The more stress on VRAM and power delivery components
- The higher the risk of permanent damage
Most GPU failures don’t happen suddenly. Performance issues usually begin with gradual thermal degradation that worsens over time if maintenance is ignored.
Professional Insight: Diagnose Before You Replace
A lot of users jump straight to upgrading when performance drops—but in many cases, that’s the most expensive solution to the wrong problem.
What looks like a “failing GPU” is often:
- Thermal inefficiency
- VRAM overheating
- Airflow restrictions
- Degraded thermal materials
All of which are fixable without replacing the card.
What Proper Diagnostics Actually Reveal
A professional diagnostic doesn’t just check if your GPU turns on—it analyzes:
- Temperature behavior under load
- Fan performance and response curves
- Thermal paste and pad condition
- Stability during real-world usage (gaming, rendering, etc.)
This process answers the question most users are really asking:
“Do I actually need a new GPU—or can this be fixed?”
If you want a deeper breakdown of how this decision is made in real scenarios, this gaming GPU repair guide walks through the exact process of identifying repairable issues vs true hardware failure—based on real cases we’ve handled.
Common signs your GPU needs maintenance include FPS drops, loud fans, temperatures above 85°C, visual glitches, and crashes. These are often caused by overheating and thermal inefficiency—not hardware failure—and can usually be fixed with proper maintenance if caught early.
DIY vs Professional GPU Maintenance: What’s the Real Risk?
DIY GPU maintenance often looks like a cost-saving shortcut, but in reality it introduces significant technical and financial risk when not performed with proper tools, experience, and diagnostic knowledge.
What seems like a simple cleaning or thermal paste replacement can quickly escalate into performance degradation—or permanent hardware damage.
Technical Insight
A GPU is a highly sensitive component with tightly engineered thermal and electrical systems. During maintenance, technicians may need to:
- Remove the heatsink assembly
- Handle thermal pads with precise thickness tolerances
- Reapply thermal paste with correct coverage and pressure
- Reassemble fan and PCB components without stress damage
Even minor mistakes—such as uneven pressure, incorrect pad placement, or dust trapped under the heatsink—can lead to:
- Thermal throttling
- Fan instability or noise issues
- VRAM overheating
- Long-term degradation of the GPU core
This is why professional diagnostics matter: performance issues are not always caused by dust, and misdiagnosis is one of the most common DIY failures.
GPU maintenance involves more than cleaning. Thermal pad thickness, mounting pressure, airflow dynamics, and thermal conductivity all directly affect long-term stability and cooling performance.
DIY vs Professional GPU Maintenance (Comparison)
| Category | DIY Maintenance | Professional Maintenance |
|---|---|---|
| Cost | Lower upfront cost | Higher upfront investment |
| Tools & Equipment | Basic tools (compressed air, screwdrivers) | Thermal calibration tools, ESD-safe workstations |
| Risk Level | High (physical damage, misassembly) | Low (controlled procedures) |
| Diagnostics | None or limited visual inspection | Full thermal, performance, and stress diagnostics |
| Thermal Paste & Pads | Often incorrect application | Precision-matched materials and placement |
| Warranty Impact | Risk of voiding warranty | Warranty-safe procedures (when applicable) |
| Long-Term Reliability | Uncertain | Optimized and validated under load |
Professional Perspective
Professional GPU maintenance is not just about cleaning—it is a structured diagnostic and optimization process. This includes:
- Thermal performance benchmarking before and after servicing
- Identifying hidden issues such as micro-throttling or VRAM hotspots
- Ensuring airflow efficiency across the entire system
- Using manufacturer-grade or equivalent thermal materials
In high-performance or expensive GPUs, this level of precision directly impacts lifespan, stability, and gaming performance consistency.
This topic requires real-world technical experience because GPU maintenance involves precision hardware handling, thermal engineering principles, and diagnostic interpretation—not just cleaning.
Professional servicing reduces uncertainty, improves long-term stability, and ensures performance is restored based on data, not assumptions.
Working with a high-end or expensive GPU? Professional maintenance helps reduce the risk of accidental damage, overheating issues, and improper reassembly that can impact long-term reliability.
Book Professional GPU ServiceCase Insight: Advanced GPU Restoration & Performance Recovery After Severe Thermal Stress and Liquid Damage
Coffee vs RTX 4090… This Happened
Not all GPU performance issues come from dust or old thermal paste. In high-end systems, failures can escalate into severe hardware degradation caused by heat stress, contamination, or liquid damage.
In one advanced repair case, a high-performance gaming desktop experienced extreme instability and thermal issues after exposure to liquid damage and prolonged overheating conditions.
Upon inspection, the GPU showed:
- Corrosion forming across critical power delivery paths
- Thermal instability and inconsistent voltage behavior
- Heavy residue contamination affecting board integrity
- Partial failure risk in power regulation components
This level of damage goes far beyond routine maintenance and requires board-level diagnostics.
Routine GPU maintenance restores cooling efficiency. Advanced GPU restoration repairs electrical, thermal, and power delivery damage caused by contamination, overheating, or hardware failure.
Technical Restoration Process
To recover the GPU safely, a structured multi-stage restoration process was required:
1. Full Disassembly & Component Isolation
The GPU was completely stripped down to expose the PCB, heatsink assembly, and power delivery system.
2. Ultrasonic Cleaning Process
A deep ultrasonic cleaning procedure was used to remove:
- Conductive residue from liquid contamination
- Corrosion buildup on sensitive electrical paths
- Microscopic debris affecting signal stability
This step is critical because visual cleaning alone cannot remove internal contamination trapped under components.
3. Precision Drying & Inspection
After cleaning, the board underwent controlled drying and micro-level inspection to identify damaged or unstable circuits.
4. Vacuum-Assisted Pad Restoration
A vacuum workstation was used to clean and restore thermal pad contact surfaces, ensuring proper heat transfer integrity.
5. Micro-Soldering & Component-Level Repair
Damaged or compromised power components were repaired or replaced using micro-soldering techniques to restore stable power delivery across the GPU rails.

Performance Outcome (Before vs After)
| Metric | Before Restoration | After Restoration |
|---|---|---|
| GPU Stability | Frequent crashes / instability | Fully stable under load |
| Thermal Behavior | Uncontrolled spikes / overheating risk | Restored thermal consistency |
| Power Delivery | Corrupted / unstable rails | Repaired and normalized |
| Usability | Non-functional or unreliable | Fully operational gaming performance |
Why This Is Not “Normal Maintenance”
This type of repair demonstrates a key distinction often missed in consumer discussions:
Routine cleaning fixes thermal inefficiency
Advanced restoration fixes hardware-level failure
Without board-level expertise, ultrasonic cleaning, and micro-soldering capabilities, this type of GPU would typically be considered irreparable.
Key Professional Takeaway
High-end GPUs like the RTX 4090 are not just plug-and-play components—they are densely engineered systems where thermal performance, power delivery, and signal integrity are tightly interconnected.
When failure occurs at the electrical or contamination level, recovery requires:
- Diagnostic precision (not guesswork)
- Specialized equipment (ultrasonic + vacuum systems)
- Component-level repair expertise (micro-soldering)
This is what separates surface-level maintenance from true hardware restoration.
Severe GPU overheating or liquid damage can create electrical instability, corrosion, and power delivery failures that go far beyond normal maintenance. Recovering these systems safely requires advanced diagnostics, ultrasonic cleaning, and board-level repair expertise.
Experiencing crashes, overheating, or instability on a high-end GPU? Advanced diagnostics can identify whether the issue is thermal, electrical, or related to liquid damage before permanent failure occurs.
Get Advanced GPU DiagnosticsWhy Professional GPU Maintenance Matters
GPU maintenance isn’t just about cleaning—it’s about precision, diagnostics, and protecting a high-value component.
Improper cleaning or repasting can:
- Damage delicate hardware
- Void warranties
- Cause worse overheating issues
Professional servicing ensures:
- Correct thermal paste application
- Safe disassembly and reassembly
- Full system airflow optimization
If your GPU is overheating, underperforming, or making excessive noise, it’s worth having it evaluated properly. The team at Prime Tech Support works with gaming systems every day, diagnosing real-world issues and restoring performance without unnecessary upgrades.
You can explore available services here:
Or call 786-600-6999 to speak with a technician about your setup.
Proper GPU servicing helps restore cooling efficiency, stabilize performance, reduce fan noise, and extend the lifespan of expensive gaming hardware.
GPU maintenance is one of the most cost-effective ways to extend your system’s life and recover lost performance. Whether you’re gaming competitively or just want a quieter, cooler PC, regular upkeep makes a measurable difference.
Handled correctly, it keeps your system running like it should. Handled incorrectly—or ignored—it leads to expensive problems down the line.
Need Professional GPU Maintenance or Repair?
If your gaming PC is overheating, throttling performance, crashing under load, or making excessive fan noise, professional diagnostics can identify the real cause before permanent damage occurs.
Prime Tech Support provides advanced GPU maintenance, thermal optimization, diagnostics, and board-level repair services for gaming desktops and high-performance systems.
Schedule Gaming PC Service
Explore more
Share this
Frequently Asked Questions GPU Maintenance Guide: Clean & Boost Performance
How often should I clean my GPU?
When should I replace GPU thermal paste?
Can cleaning a GPU improve FPS?
Is it safe to use compressed air on a GPU?
What temperature is too high for a GPU?
Should I repaste my GPU myself?
What’s the biggest mistake people make with GPU maintenance?
Gaming PC Not Working? Get Expert Diagnosis and Repair Options
If your gaming PC is experiencing issues after a CPU installation, upgrade, or hardware change, getting a proper diagnosis is the first step. Problems like bent CPU pins, motherboard socket damage, or BIOS incompatibility can prevent your system from booting.
At Prime Tech Support, we specialize in advanced gaming PC diagnostics and hardware-level repairs, including complex issues that other shops may not be able to resolve.
In Miami? Get Local Gaming PC Repair Service
Our team is ready to help you. We offer professional diagnostics and fast turnaround times for gaming PCs and high-performance systems.
Not in Miami? Use Our Nationwide Mail-In Repair Service
We provide secure nationwide mail-in repairs for gaming PCs, including CPU and motherboard issues. Whether you're dealing with bent pins, installation damage, or no-boot problems, our technicians can safely diagnose and repair your system.
We work with customers across the United States, offering clear communication, careful handling, and professional results.
Gaming PC Repair Services (Miami & Nationwide)


Reviews from our Gaming PC Customers in USA
Amazing work there very smart techs, anything you need done explain and your wish will be granted. I needed my power supply optimization, and the tech had no issues doing it. Thank you so much for the support. Click here to read the review on Google
 Joshua Sewell Miami, FL
I brought in my gaming PC for high CPU temperature issues. I was beyond pleased with the service I received. They kept me informed through out the diagnostic process and repair by sending pictures and also the diagnostic reports. The location is super clean and the staff and tech experts were super friendly, polite, and informative through out the process. I was informed they do gaming pc builds and offer a lot services and maintenance for gaming PCs, which is good to know and have in the miami area. Their services are reasonably priced. Highly recommend and will be coming back for any future needs. Click here to read the review on Yelp
 Jennifer Miami, FL

This is the place for any of your gaming pc build needs. I recently purchased a 4090 Founders edition graphics card and a LIAN LI XL case and needed them to transfer my components from my old case to my new case along with my new graphics card. I called Prime tech support, and they were excited to do the install Darian and Augustus greeted me when I arrived and finished the job the same day! Darian was the tech that did the installation, and he did an amazing job and offered to run some tests for me when I came to pick it up in person, to show my PC was running at a premium level. I recommend this place for any gaming pc needs and builds.
I am attaching pictures of my build.
thank you! Click Here to read th review on Google