How To Fix Blue Screen Of Death In Gaming Computers
Table of Contents
What Causes The Blue Screen Of Death
Manually Fix Blue Screen Errors When Playing Games
Identify the Cause of the Blue Screen Error
Try to Fix the Blue Screen Error by Following the Instructions in the Windows Error Message
Fix Blue Screen Errors That Occur While Launching Or Playing Games
Uninstall And Reinstall The Graphics/Display Drivers
Recovering Data After Fixing The Error
What Causes The Blue Screen Of Death
The Blue Screen of Death (BSOD), often accompanied by error codes is the last thing you want to encounter while trying to enjoy an evening of Gaming. Hardware conflicts, corrupt software, outdated drivers, damaged components, and even malware infections can contribute to this phenomenon. Diagnosing the exact cause is crucial to finding effective solutions and preventing future occurrences. We will show you how to deal with this and how to know if this is a DIY fix or if you need to get professional help from the best team in Miami, Florida.
Manually Fix Blue Screen Errors When Playing Games
1. Identify the Cause of the Blue Screen Error
The first step in defeating the BSOD is to identify the cause, if it comes with an error code take note of it, we will follow a few error codes and their fixes:
Error 1: "Critical Processed Died" Blue Screen on Windows 10 /11
You might encounter a blue screen on your computer with the message, "Your PC ran into a problem and needs to restart. We are just collecting some error info, and then we will restart for you".
There are two different scenarios to address this issue:
Step 1: Accessing Desktop
If you can access your desktop and see all the features:
- Click on your search box and type "reset".
- Choose "Reset this PC" from the suggestions.
- An option for "Advanced Startup" will appear. Click on "Restart Now"
- You will be directed to the "Advanced Options".
If you Can't Access Desktop
If you're unable to access your desktop:
- On your laptop or PC, press and hold the power button until the computer shuts down.
- Restart your computer by pressing the power button.
- Once you see the Windows logo on your screen, press and hold the power button to force a shutdown.
- Repeat the forced shutdown three times.
- Upon restarting, you will be directed to the "Advanced Options".
Step 2: Troubleshooting
- From the Advanced Options, click on "Troubleshoot".
- Next, click on "Advanced options".
- Initially, try "Startup Repair" to see if it resolves the issue.
If the problem persists, return to the same options and select "Command Prompt".
- In the command prompt, you'll need to run several commands. The first command is `bootrec /fixMBR`, click enter and follow by `bootrec /fixboot`.
- If you encounter an "Access Denied" message, proceed to the next commands: `bootsect /nt60 sys` click enter and and `bootrec /fixboot`.
- The next command will be `bootrec /rebuild`, click enter and follow by `sfc /scannow`. The `sfc /scannow` command might take some time as it scans for integrity violations. Once completed, the last command will be `chkdsk c:`. Wait for it to complete.
After running the necessary commands, close the command prompt and click "Continue". If there were any disk or hard drive issues, they should now be resolved.
Error 2: Inaccessible Boot Device
The "inaccessible boot device" blue screen error arises when Windows is unable to access the system partition. Potential reasons include:
- A faulty installation of the most recent Windows update.
- Outdated, misconfigured, or incompatible drivers.
- New or old hardware conflicts with the latest Windows update.
- Corruption of the entire hard drive or the partition where Windows resides.
- Malware infections that corrupt system files or drivers.
- Sometimes, the error might be due to a loose cable connection of the hard disk.
How To Fix Inaccessible Boot Device
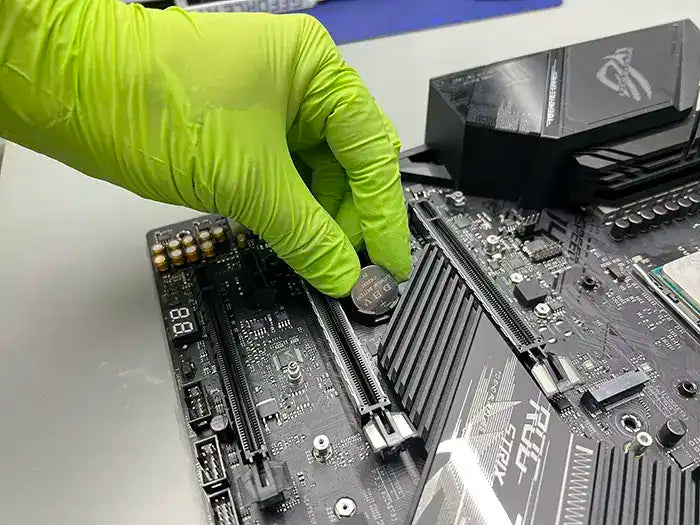
Before starting any fixes, you need to check the cable connection of the hard drive. Ensure it is not loose. If you have a laptop, remove the hard drive, clean the connection port with tissue paper, and then insert it in the slot. Also, remove any newly attached hardware. If the loose cable connection or the new hardware is the cause of the issue, you will know that, if you are still facing the blue screen error:
Step 1: Enable AHCI Mode in BIOS
AHCI mode provides advanced features to the SATA interface. Some hard drives can't function if the AHCI mode is not enabled. To enable it, you need to open the BIOS settings of your PC. Press F2 or delete key when booting the system. Check your system manual or the internet to know the key for entering BIOS. Once you are in BIOS, locate the advanced options. Then set AHCI mode, now turn the AHCI mode value to enabled. Save the settings and quit. Restart the PC.
Step 2: Opening Command Prompt In Repair Mode
If your system is continuously rebooting by flashing the blue screen error, don't worry. After a couple of reboots, the system will go into automatic repair
mode. In this mode, you'll see "restart" and "advanced options". Now go to advanced options. If you can't reach this options page, hold the shift key while booting. If you still can't reach here, you'll need to boot from a Windows 10 CD or USB drive. Instructions to create a bootable Windows 10 USBBoot the error-encountering PC with that media. You will see "press any key to boot from CD or DVD". Press any key, enter your preferences, and click next. Now click on "repair your pc", then go to troubleshoot and select advanced options.
Step 3: Options in Advanced Repair
System Restore: If your PC has a restore point, use it to restore Windows.
System Image Recovery: This recovers Windows with an image file if available.
Startup Repair: This tries to fix problems preventing Windows from loading.
Go back to the previous version: If you recently installed a new Windows version, revert to the previous one. This option is only available if the new version was installed in the last 10 days.
Command Prompt: This is our last resort for advanced troubleshooting.
Step 4: Restore backup of essential system files:
Restore backup of essential system files. Open the command prompt. Now type `c:` and hit enter. You can replace `c` with your system drive letter. Then type `dir` and hit enter to make sure you are in the system drive. You will see the Windows files and folders.
Now type `cd windows/system 32/config` then hit enter to reach the config directory. Then enter `dir` to list all the files and folders. The `regback` folder contains the backup of these essential files, so we need to restore these files from the `regback` folder.
First, change the directory to `regback`. Run `cd regback` then run `dir` to see the contents. We are going to restore these files to the config folder. If you don't see anything here or if there is no data and you see zero, this step will not work for you. You need to move to the next fix.
Before replacing these files, we should take a backup of these files itself to revert in case of any issue. We will just rename these files so that they won't get replaced in the process. We need to rename default, sam, security, software, and systemfiles. Type `ren *file name* *file name*1` then hit enter. This way, we will remember that these are the backup files. Do this with all five files this way:
`ren DEFAULTDEFAULT1`
`ren SAMSAM1`
`ren SECURITYSECURITY 1`
`ren SOFTWARESOFTWARE1`
`ren SYSTEM SYSTEM1`
hit enter.
Move to the `reg back` directory. Run `cd regback`. We need to copy the files to the config directory. To copy all these files, type `copy *.* ..`.
Verify that the files are copied in the config directory. Now type `exit` hit enter and then restart your PC.
Remove the bootable media USB device. Then boot your device with the hard drive. Hopefully, this will resolve the inaccessible boot device error.
Error 3: Uninstall Recently Installed Update Packages
Uninstall recently installed update packages. The most common reason for the inaccessible boot device error is the faulty installation of the latest Windows updates. To remove these updates, select the command prompt option.
Now, type `c:` and hit enter. Remember, you can replace `c` with your system drive letter. Next, type the c: dism /Image:c:\ /Get-Packages /Format:table command and press enter.
Ensure you change `c` with your actual system drive letter. This command will list all the packages that are installed on your system.
Focus on the date field to identify the recently installed packages and then note down their complete names. To remove a specific package type dism /Image:c:\ /Remove-Package /PackageName:[package name] and input it. Make sure to replace the generic "package name" with the actual recent package name that you noted down earlier. After doing so, press enter.
Conclude by restarting your PC to check if the problem persists. If the issue remains, repeat the process, removing the subsequent packages until the root cause package is identified.
Try to Fix the Blue Screen Error by Following the Instructions in the Windows Error Message
Microsoft's Windows operating system often provides diagnostic information within the BSOD itself. These nuggets of insight can steer you towards the appropriate solutions, tailored to the error you're facing.
Fix Blue Screen Errors That Occur While Launching Or Playing Games
Uninstall And Reinstall The Graphics/Display Drivers
Graphics drivers serve as the vital bridge between each hardware component of your PC. Corrupted or outdated graphics drivers can cause a BSOD. to avoid these issues download and install the latest drivers from the manufacturer’s website.
If you get the blue screen only when you start playing your favorite games and aren't able to fix them by updating the GPU drivers or, with the methods we just teach you, then it is probably caused by a malfunctioning GPU.
Recovering Data After Fixing The Error
To recover data after fixing the error yourself we recommend you reach professional help like ours, as you succeeded in fixing the error you might think that you'll be able to recover your data by yourself, but you'll find this task way more difficult and easier to mess up.
Stop Your Computer From Crashing- By Prime Tech Support
We recommend doing a hardware tun up with us to prevent incompatibility problems, detect problems that the customer has not noticed, check the logs, components, the BIOS, and perform a deep cleaning.